Scrubs Logo

CONTACT US: 020 8146 8571
London's #1 End of Tenancy Specialists
CONTACT US: 020 8146 8571
London's #1 End of Tenancy Specialists

Blog

How to Deep Clean an Oven: A Complete Guide

How to Deep Clean an Oven: A Complete Guide A sparkling clean oven not only looks great but also ensures better-tasting meals and prolongs the appliance’s lifespan. This comprehensive guide will help you deep clean your oven efficiently, including recommendations for top cleaning products and handy tips. Essential Tools and Materials Before you start, gather everything you’ll need to make the process smooth and hassle-free: Rubber gloves: Protect your hands from harsh chemicals and grease. Scrubbing pads or sponges: For scrubbing away stubborn grime. Microfiber cloths: Perfect for wiping and polishing surfaces. Plastic scraper: To remove burnt-on residue without scratching. Baking soda: A natural, non-toxic cleaner. White vinegar: Excellent for breaking down grease. Oven cleaner spray: For heavy-duty grime removal (recommended products listed below). Brush or toothbrush: For cleaning tight crevices. Trash bags: For disposing of food debris and paper towels. Bucket or bowl: To mix homemade cleaning solutions. Preparing the Oven for Cleaning Preparation is crucial to ensure safety and effectiveness. Follow these steps: Turn off the oven: Ensure it’s completely cool and unplug it if possible. Remove oven racks and trays: Take out all detachable parts and set them aside. Lay down protective layers: Place newspapers or old towels around the oven to catch drips or spills. Ventilate the kitchen: Open windows or turn on a fan if you’re using chemical cleaners. Cleaning the Oven Racks Oven racks often accumulate baked-on grease and grime. Clean them separately for the best results: Soak in warm soapy water: Fill a bathtub or large sink with hot water and add dish soap or baking soda. Submerge the racks for at least 30 minutes. Scrub thoroughly: Use a scrubbing pad or toothbrush to remove softened grime. Rinse and dry: Rinse with clean water and let them dry completely before reinserting. Applying a Cleaning Solution Assuming you do not have access to professional cleaning solutions, like the ones we use at Scrubs Cleaning, there are many good over-the-counter detergents that can be used for professional looking results. Best Commercial Oven Cleaners: Oven Pride: Recommended by Scrubs Cleaning. Weiman Oven & Grill Cleaner: Gentle but effective on tough stains. HG Oven, Grill and BBQ Cleaner: A more expensive but very effective option. Mr. Muscle Oven Cleaner: Ideal for burnt-on food residue. Homemade Option: If you prefer a more natural, eco-friendly solution, mix half a cup of baking soda with a few tablespoons of water to create a paste. It’s non-toxic, effective, and safe for most surfaces. Apply generously: Spread your chosen cleaner or baking soda paste over the interior surfaces, avoiding heating elements. Let it sit: Allow it to sit for at least 20-30 minutes or overnight for stubborn stains. Scrubbing and Wiping Once the cleaner has done its job, it’s time to scrub away the grime: Use a scraper: Gently remove softened residue with a plastic scraper. Scrub corners and crevices: Use a brush or toothbrush to tackle hard-to-reach spots. Wipe with a damp cloth: Remove loosened grime and cleaner residue using a damp microfiber cloth. Repeat if necessary: For particularly tough stains, reapply the cleaning solution and repeat the process. Cleaning the Oven Door The oven door often gets greasy and cloudy from cooking. Here’s how to clean it effectively: Remove the glass panel (if possible): Check your oven’s manual to see if the glass panel can be detached for easier cleaning. Apply cleaner: Use baking soda paste or a glass-safe oven cleaner. Scrub and polish: Use a sponge or cloth to remove grime, then wipe with a damp cloth to avoid streaks. Polish with vinegar: Spray vinegar on the glass and buff with a microfiber cloth for a streak-free shine. Final Rinse and Dry Once the oven is clean, make sure to rinse and dry all surfaces thoroughly: Wipe with clean water: Use a damp cloth to remove any remaining cleaner residue. Dry completely: Use a microfiber cloth to dry all surfaces to prevent streaks or watermarks. Reinsert racks and trays: Once dry, place the clean racks and trays back into the oven. Handy Tips for Oven Maintenance To keep your oven clean for longer, follow these tips: Use oven liners: Place a non-stick liner at the bottom of the oven to catch spills. Wipe spills immediately: Clean up any spills or drips as soon as the oven cools. Regular light cleaning: Wipe down the oven weekly to prevent grime buildup. Cover food: Use lids or aluminium foil when baking or roasting to minimize splatters. Run a self-cleaning cycle: If your oven has this feature, use it periodically to burn off residue. Summary Deep cleaning an oven doesn’t have to be daunting. By gathering the right tools, using effective cleaning products, and following a step-by-step process, you can restore your oven to its pristine condition. Whether you prefer commercial cleaners like Easy-Off or natural alternatives like baking soda and vinegar, the key is allowing the solution time to break down grease before scrubbing. With regular maintenance and these handy tips, you can keep your oven sparkling clean and functioning efficiently for years to come. Feel free to Contact Us if you require a Deep Clean of your house, including appliances.

Read More »

How to Deep Clean Your Fridge and Freezer: A Step-by-Step Guide

How to Deep Clean Your Fridge and Freezer: A Step-by-Step Guide Keeping your fridge and freezer clean is essential for maintaining food safety, prolonging the life of your appliances, and ensuring a fresh-smelling kitchen. This comprehensive guide will take you through the process of deep cleaning your fridge and freezer. Essential Tools and Materials Before you start, gather the tools and materials you’ll need for an efficient cleaning process. Having everything ready will save time and ensure the best results. Soft sponge or cloth: For scrubbing and wiping surfaces without causing scratches. Microfiber cloths: Ideal for drying and polishing surfaces. Mild dish soap: A gentle cleaning agent to remove grime and grease. White vinegar or baking soda: Natural cleaners for tough stains and odours. Bucket or basin: For mixing cleaning solutions and holding warm water. Toothbrush or small scrub brush: Perfect for cleaning tight spaces and crevices. Vacuum with a nozzle attachment: Useful for cleaning coils and hard-to-reach areas behind the fridge. Plastic spatula or scraper: For safely removing stubborn ice or food residues. Preparation and Safety Preparation is key to a successful deep cleaning. Take the following steps to prepare your fridge and freezer: Turn off the appliance: Unplug the fridge and freezer to conserve energy and ensure safety while cleaning. Remove all food items: Transfer perishable goods to a cooler with ice packs to keep them fresh during the cleaning process. Defrost the freezer: If there’s ice buildup, allow the freezer to defrost. Place towels around the base to catch melting water. Gather cleaning tools: Have your cleaning materials and tools within reach to streamline the process. Emptying and Sorting Contents As you empty the fridge and freezer, take the opportunity to organise and declutter. Check expiration dates: Discard any expired or spoiled items. Sort by category: Group similar items together, such as dairy, meats, and vegetables, for easier restocking later. Wipe containers: Clean sticky jars or containers before placing them back in the fridge. Removing Shelves, Drawers, and Racks To clean thoroughly, remove all detachable components from your fridge and freezer. Take out shelves, drawers, and racks: Carefully remove these parts and set them aside. Soak in warm soapy water: Place them in a basin or sink filled with warm water and mild dish soap. Let them soak to loosen grime. Scrub and rinse: Use a sponge or brush to clean each piece, then rinse thoroughly with clean water. Dry completely: Use a microfiber cloth to dry each item before reinserting them. Cleaning the Interior Now it’s time to clean the inside surfaces of your fridge and freezer. Wipe down surfaces: Use a sponge or cloth dipped in warm soapy water to clean the walls, ceiling, and floor of the fridge and freezer. Scrub stubborn stains: For tough spots, apply a paste of baking soda and water or use diluted vinegar. Let it sit for a few minutes before scrubbing. Clean crevices and seals: Use a toothbrush to clean around rubber seals and in tight corners. Rinse and dry: Wipe the interior with a damp cloth to remove soap residue, then dry with a microfiber cloth. Defrosting and Ice Removal If your freezer has built-up ice: Let the ice melt: Leave the freezer door open to allow the ice to defrost naturally. Place towels to absorb the melting water. Place hot water inside: If you want to speed the process, put bowls or glasses of hot water inside the freezer. Use a plastic scraper: Gently remove ice chunks that loosen during defrosting. Avoid sharp tools that can damage the appliance. Wipe away water: Use a cloth or sponge to remove any remaining moisture. Cleaning the Exterior Don’t forget about the outside of your fridge and freezer. A clean exterior contributes to the overall hygiene of your kitchen. Dust and vacuum coils: Use a vacuum with a nozzle attachment to clean the coils at the back or bottom of the appliance. This improves efficiency. Wipe the exterior: Use a damp cloth and mild soap to clean the doors and handles. Polish with stainless steel cleaner: If your fridge has a stainless steel finish, use a specialized cleaner to restore its shine. Clean the drip tray: Locate and empty the drip tray (if applicable), then wash and dry it thoroughly. Restocking and Organizing After cleaning, it’s time to put everything back in an organized manner. Insert shelves and drawers: Replace all detachable components once they’re dry. Restock efficiently: Place similar items together and ensure labels face forward for easy access. Use storage bins: Consider using bins or organizers to keep items tidy and prevent spills. Adjust temperature: Turn the appliance back on and set the correct temperature (below 40°F for the fridge, 0°F for the freezer). Tip: Preparing Your Fridge for a Holiday When going on holiday, it’s important to leave your fridge in a safe and hygienic state to avoid unpleasant surprises upon your return. Consume perishables: Use up or discard perishable foods to prevent spoilage. Adjust the temperature: If you’re leaving for a short trip, keep the fridge and freezer running at their normal settings. For longer trips, consider emptying and unplugging the appliance. Clean thoroughly: Wipe down all surfaces and remove any crumbs or spills to deter pests and odours. Leave the door ajar: If the fridge is unplugged, prop the door open slightly to allow airflow and prevent mould or mildew. Store essentials smartly: If the appliance remains on, stock only long-lasting items such as condiments and properly sealed frozen goods. Final Thoughts Deep cleaning your fridge and freezer might seem like a daunting task, but it’s essential for maintaining food safety, improving appliance efficiency, and keeping your kitchen fresh. By following the steps in this guide, you can ensure a thorough and effective clean. Regular maintenance, such as wiping spills immediately and checking expiration dates weekly, can reduce the frequency of deep cleans. With proper care, your fridge and freezer will remain hygienic and functional for years to come. Remember, a clean fridge

Read More »

A guide on how to Clean and Maintain Rattan and Wicker

A guide on how to Clean and Maintain Rattan and Wicker Rattan and wicker furniture and accessories are now on trend. They provide warmth, texture, and a natural charm to any space. However, due to their intricate design and delicate materials, they require proper care to maintain their beauty. In this guide, we’ll cover everything you need to know about cleaning and maintaining rattan and wicker furniture and accessories. Essential Tools and Materials Before you begin, gather the necessary tools and cleaning supplies to make the process efficient and safe for your furniture. Here’s a list of what you’ll need: Soft bristle brush: Ideal for removing dirt and dust from crevices without damaging the material. Microfiber cloths: These are gentle on the surface and help with wiping down delicate areas. Vacuum cleaner with a brush attachment: Useful for removing loose debris from tight spaces. Mild soap or detergent: Choose a gentle, non-abrasive soap to avoid damaging the finish. Bucket of warm water: For mixing the cleaning solution. Soft sponge: Perfect for applying the cleaning solution. Toothbrush: Helps reach tight spots where a larger brush can’t. White vinegar (optional): Acts as a natural disinfectant and cleaner. Furniture polish (optional): Helps maintain the shine of your rattan or wicker furniture. Dusting Your Rattan and Wicker Furniture Regular dusting is the first and most crucial step in maintaining your rattan and wicker pieces. Over time, dust can accumulate in the tiny crevices, making the furniture look dull and dirty. Steps for Dusting: Use a vacuum cleaner with a brush attachment to gently remove loose dirt and debris from the surface and crevices. For areas the vacuum can’t reach, use a soft bristle brush to sweep away the remaining dust. Wipe down the surface with a dry microfiber cloth to remove any lingering particles. Dusting regularly prevents dirt buildup and keeps your furniture looking fresh. Cleaning with a Mild Solution Once the dusting is done, it’s time to give your rattan or wicker furniture a deeper clean using a mild soap solution. Steps for Cleaning: Mix a few drops of mild soap or detergent with warm water in a bucket. Dip a soft sponge into the solution, wring it out thoroughly to avoid excess moisture, and gently wipe down the furniture. Use a toothbrush to clean hard-to-reach areas and intricate patterns. Once you’ve cleaned the entire piece, wipe it down with a damp microfiber cloth to remove any soap residue. Finally, use a dry cloth to absorb any remaining moisture. Avoid soaking the furniture, as excessive water can weaken the fibres and cause damage over time. Removing Stains Stains can occur due to spills, dirt, or prolonged exposure to the elements. Removing them quickly is key to preventing permanent discoloration. Steps for Removing Stains: If the stain is fresh, blot it gently with a dry cloth to absorb as much liquid as possible. For dried stains, prepare a mixture of equal parts white vinegar and warm water. Dip a soft cloth into the solution and gently dab the stained area. Use a toothbrush for stubborn stains, applying gentle circular motions. Wipe the area with a damp cloth to remove the vinegar solution, and dry it immediately. Test the vinegar solution on a small, hidden area first to ensure it doesn’t affect the colour or finish. Cleaning Outdoor Rattan and Wicker Furniture Outdoor furniture is exposed to weather elements, making it more prone to dirt, mildew, and fading. Steps for Cleaning Outdoor Furniture: Start by dusting and vacuuming the furniture to remove loose debris. Prepare a cleaning solution with mild soap and warm water. Use a soft bristle brush to scrub the furniture gently, focusing on areas with mildew or dirt. Rinse with a hose, ensuring that you don’t soak the furniture excessively. Dry the furniture thoroughly with a clean towel and let it air dry in the shade. Consider applying a UV-protective spray to prevent fading and weather damage. Dealing with Mildew Mildew can develop on rattan and wicker furniture, especially in humid environments. It’s important to address it promptly to avoid long-term damage. Steps for Removing Mildew: Mix one part white vinegar with three parts warm water. Dip a soft cloth or sponge into the solution and gently clean the affected areas. Use a toothbrush to scrub stubborn mildew spots. Wipe the furniture with a damp cloth to remove the vinegar residue. Dry the furniture thoroughly to prevent future mildew growth. For severe mildew issues, you may need to use a commercial mildew remover specifically designed for natural fibres. Polishing and Conditioning Polishing helps maintain the natural lustre of rattan and wicker, while conditioning prevents the material from becoming brittle. Steps for Polishing and Conditioning: Use a furniture polish specifically made for rattan or wicker. Apply a small amount of polish onto a clean cloth and rub it gently over the surface. Buff the furniture with a dry cloth to enhance the shine. Conditioning with a light coat of boiled linseed oil once or twice a year can help preserve the fibres and prevent cracking. Preventive Care Tips Prevention is better than cure when it comes to maintaining rattan and wicker furniture. Follow these tips to keep your furniture in top shape: Avoid direct sunlight: Prolonged exposure to sunlight can cause fading and drying of the fibres. Use cushions: Cushions reduce wear and tear on the seating areas. Keep indoors during extreme weather: If your furniture is outdoor, store it indoors during harsh weather conditions. Regular dusting: Prevents dirt buildup and reduces the frequency of deep cleaning. Rotate furniture: Rotating pieces periodically ensures even wear and exposure. Final Thoughts Rattan and wicker furniture bring a natural elegance to any space, but they require proper care to stay beautiful and functional for years. Regular dusting, gentle cleaning, and preventive maintenance go a long way in preserving these delicate materials. With the right tools, techniques, and a little bit of effort, your rattan and wicker pieces can remain timeless additions to your home. By

Read More »

How to Clean a Bathroom: A Step-by-Step Guide for Sparkling Results

How to Clean a Bathroom: A Step-by-Step Guide for Sparkling Results A clean bathroom is not only essential for hygiene, but it also creates a pleasant and inviting space in your home. Cleaning your bathroom may seem like a daunting task, but with the right approach, cleaning can be quick, efficient, and even satisfying. Whether you’re tackling your sink, toilet, shower, or bathtub, this comprehensive guide will walk you through the best methods and cleaning products to use to achieve a sparkling bathroom. Why a Clean Bathroom Matters Bathrooms are high-traffic areas and often become breeding grounds for germs, mould, and mildew. Regular cleaning can help eliminate bacteria, prevent the buildup of soap scum and limescale, and maintain the overall appearance of your bathroom. Plus, a fresh and clean bathroom makes for a more enjoyable experience every time you step in. What You’ll Need to Clean Your Bathroom Before we dive into the cleaning steps, it’s important to gather the right tools and cleaning products. Here’s a list of products you should consider buying: All-purpose cleaner Disinfectant spray or wipes Glass cleaner Toilet bowl cleaner Baking soda Vinegar Microfiber cloths Scrub brushes (soft and hard-bristled) Sponges Rubber gloves A mop and bucket (if needed) A squeegee for the shower glass Step 1: Declutter and Prepare Your Bathroom Before you begin cleaning, remove any items from countertops, shelves, and the floor. This includes toiletries, towels, rugs, and bath products. You want to start with a clear space so you can reach every surface with ease. If you have bath mats or towels that need washing, set them aside. Step 2: Clean the Sink The bathroom sink is where a lot of everyday grime, toothpaste, soap scum, and water spots accumulate. Here’s how to clean it effectively: Remove Items: Take all toiletries, soap dispensers, and toothbrush holders off the counter. Apply Cleaner: Spray an all-purpose cleaner or a mild bathroom cleaner on the sink, faucet, and surrounding countertop. A cleaner with natural ingredients, such as one that includes citric acid or vinegar, can effectively break down soap scum without being harsh on surfaces. Clean Faucets: Use a microfiber cloth or sponge to wipe down the faucet handles, spout, and base. Be sure to scrub any mineral buildup, which can often appear around the faucet where water has dried. Scrub the Sink: For stubborn stains, sprinkle some baking soda onto the surface of the sink. Use a non-abrasive scrub brush to scrub the sink in circular motions, paying extra attention to any grime around the drain and faucet. You can also use a toilet cleaner such as Harpic (more on that later!). Rinse and Dry: Rinse the sink thoroughly to remove all cleaning products and grime. Use a dry cloth to wipe away water spots and keep the sink looking shiny. Step 3: Clean the Toilet Toilets are often the focal point of bathroom cleaning, and for good reason. It’s essential to keep them spotless and disinfected to prevent germs and odours from spreading. Here’s how to do it: Apply Toilet Bowl Cleaner: Pour a generous amount of toilet bowl cleaner around the rim of the toilet bowl. Let it sit for 10-15 minutes to disinfect and dissolve any buildup. Scrub the Toilet Bowl: After the cleaner has had time to sit, use a toilet brush to scrub the inside of the bowl, including under the rim. Make sure to scrub the entire bowl to remove stains and mineral deposits. Disinfect the Exterior: Spray the exterior of the toilet, including the tank, lid, seat, and base, with a disinfectant cleaner. Wipe down these areas using a microfiber cloth. Don’t forget to clean the flush handle—this is a high-touch area that can harbour germs. Flush and Rinse: After scrubbing the toilet bowl, flush to rinse away the cleaner. Wipe down the seat and lid with a clean, dry cloth.   Step 4: Clean the Shower The shower is one of the most challenging areas to clean due to soap scum, mold, and mildew buildup. However, with the right products and technique, you can keep it spotless. Here’s how to do it: Remove Items: Take out any shampoo bottles, soap, or other products from the shower. Apply a Shower Cleaner: Use a bathroom cleaner specifically designed for soap scum and mildew, or mix equal parts of vinegar and water in a spray bottle. Spray the entire shower, including walls, doors, and the shower floor. Let the cleaner sit for 10-15 minutes to break down grime and soap residue. Scrub the Tiles and Grout: Using a soft scrub brush or sponge, scrub the shower tiles and grout lines to remove buildup. For stubborn stains, you can make a paste using baking soda and water. Apply it to the grout lines and scrub it gently with a brush. Clean the Shower Doors: If you have glass shower doors, spray them with a glass cleaner or a vinegar-water solution to remove water spots and soap scum. Use a squeegee to wipe down the glass, ensuring a streak-free finish. Rinse and Dry: After scrubbing, rinse the entire shower area thoroughly with warm water. Wipe down all surfaces with a clean, dry cloth to remove excess water and prevent new spots from forming. Step 5: Clean the Bathtub Cleaning the bathtub is similar to cleaning the shower, but since bathtubs often accumulate soap scum and stains, you may need to use a stronger cleaner. Here’s how to clean your bathtub effectively: Apply Cleaner: Apply a bathroom cleaner to the bathtub surface, focusing on areas with soap scum buildup or stains. You can use a specific tub cleaner or a mixture of equal parts vinegar and water. Scrub: Use a sponge or soft scrub brush to clean the tub’s surface. Pay attention to the drain area and faucet to ensure no grime is left behind. Clean the Overflow and Jets: If your bathtub has jets or an overflow drain, be sure to clean those areas as well. Use a toothbrush

Read More »

Deep Cleaning Grout: Professional Tips for a Sparking Finish

Deep Cleaning Grout: Professional Tips for a Sparkling Finish Grout is the unsung hero of tiled surfaces, holding everything together while enhancing the aesthetic appeal of kitchens, bathrooms, and floors. However, over time, grout can accumulate dirt, mould, and mildew, dulling its appearance and compromising hygiene. If you’ve ever struggled to bring your grout back to life, you’re not alone. In this guide, we’ll explore the most effective ways to deep clean grout, sharing professional tips to achieve that sparkling finish. Why Grout Gets Dirty Grout is porous, meaning it absorbs dirt, grime, and moisture over time. This makes it prone to discoloration, especially in high-traffic areas or damp environments like bathrooms. Regular maintenance can help, but sometimes only a deep clean will restore grout to its original state. Essential Tools and Materials for Cleaning Grout Before diving into grout cleaning methods, have a look at the following tools and materials: Grout brush or an old toothbrush Microfiber cloths Spray bottle Baking soda White vinegar Hydrogen peroxide Dish soap Commercial grout cleaner Steam cleaner (optional for professional results) Protective gloves Safety goggles Method 1: The Baking Soda and Vinegar Approach This natural cleaning solution is effective for mildly soiled grout and safe for most surfaces. Here’s how to use it: Create a Paste: Mix three parts baking soda with one part water to form a thick paste. Apply the Paste: Spread the paste onto the grout lines, ensuring full coverage. Spray Vinegar: Fill a spray bottle with white vinegar and lightly spray over the baking soda paste. The mixture will fizz, helping to lift dirt and grime. Scrub the Grout: Use a grout brush or an old toothbrush to scrub the grout lines gently but thoroughly. Rinse and Wipe: Rinse with warm water and wipe clean with a microfiber cloth. This method is ideal for a DIY deep clean that’s both affordable and eco-friendly. Method 2: Hydrogen Peroxide and Baking Soda For more stubborn stains, hydrogen peroxide provides an extra cleaning boost. Mix a Cleaning Paste: Combine hydrogen peroxide with baking soda to create a thick paste. Apply Generously: Spread the paste along the grout lines. Let It Sit: Allow the mixture to sit for 10-15 minutes to penetrate stains. Scrub and Rinse: Scrub with a grout brush, then rinse with warm water. Hydrogen peroxide is an excellent choice for tackling tough stains without resorting to harsh chemicals. Method 3: Using Commercial Grout Cleaners If natural methods don’t yield the desired results, consider a commercial grout cleaner. These products are formulated to dissolve tough grime and stains. Choose the Right Cleaner: Look for a grout cleaner suitable for your tile type (e.g., ceramic, porcelain, or natural stone). Follow Instructions: Apply the cleaner as directed on the label, usually by spraying or spreading it onto the grout lines. Scrub and Rinse: After the recommended dwell time, scrub the grout and rinse thoroughly. Commercial cleaners are perfect for a deep clean when dealing with heavily soiled or neglected grout. Method 4: Steam Cleaning for a Professional Clean Steam cleaning is a highly effective, chemical-free method for deep cleaning grout, often used by professional cleaners. Prepare the Steam Cleaner: Fill the machine with water and allow it to heat up. Target Grout Lines: Use the steam cleaner’s nozzle to focus on grout lines, blasting away dirt and bacteria. Wipe Clean: Use a microfiber cloth to wipe away loosened debris. Steam cleaning not only removes surface dirt but also kills bacteria and mould, leaving grout hygienically clean. Pro Tips for Maintaining Clean Grout Seal the Grout: After cleaning, apply a grout sealer to protect against future staining and moisture absorption. Regular Cleaning: Wipe down tiled surfaces weekly to prevent buildup. Use Mats and Rugs: In high-traffic areas, use mats to minimize dirt transfer. Address Spills Quickly: Promptly clean up spills to prevent stains from setting in. When to Call in the Professionals Sometimes, grout cleaning requires a professional touch, especially for large areas, deeply embedded stains, or commercial properties. Professional cleaners have access to industrial-grade equipment and specialized cleaning solutions, ensuring a thorough clean with long-lasting results. If you’re in London and looking for expert grout cleaning services, our team is here to help. We specialize in deep cleaning and professional care for all types of tiles and grout. Final Thoughts Clean grout can transform the look of your tiled surfaces, enhancing both appearance and hygiene. Whether you opt for natural remedies, commercial products, or professional services, the key is consistency and the right approach. By following the methods outlined in this guide, you’ll achieve a deep clean and keep your grout looking like new. If you’re ready for a professional clean, contact us today for expert advice and services tailored to your needs.

Read More »

Cleaning Your Home for Guests This Christmas: A complete guide

How to Clean Your Home for Guests This Christmas The festive season is upon us, and that means family gatherings, cozy dinners, and a house full of guests! But before you start decking the halls, it’s essential to ensure your home is clean, organized, and guest-ready. Whether you’re tackling the task yourself or considering professional house cleaners, a spotless home is key to making a great impression this Christmas. In this guide, we’ll walk you through how to prepare your home with expert housekeeping tips and tricks, including when to consider deep cleaning and domestic cleaning services to help you shine this holiday season. Step 1: Start with a Plan Cleaning your home for Christmas guests can feel overwhelming, but with a plan in place, it becomes manageable. Begin by creating a cleaning checklist that prioritizes areas where your guests will spend the most time, such as: Living rooms: Where people gather and relax. Dining areas: The centerpiece for festive meals. Guest bathrooms: A non-negotiable spot for cleanliness. Guest bedrooms: If you’re hosting overnight visitors. By tackling one area at a time, you’ll ensure no spot is overlooked, and your home will be ready for Christmas festivities in no time. Step 2: Declutter and Organise Before diving into the actual cleaning, decluttering is a crucial first step. A clutter-free home looks more spacious, inviting, and festive. Here’s how to go about it: Living areas: Remove items like magazines, remote controls, or toys that don’t need to be on display. Use decorative baskets to store any essentials neatly. Entryways: Clear away shoes, coats, and umbrellas. Guests will appreciate a tidy space as they enter your home. Kitchens: Clear countertops of unnecessary appliances or clutter to make space for cooking and serving holiday treats. Decluttering doesn’t just make cleaning easier; it also gives your guests a sense of warmth and welcome as they move through your home. Step 3: Tackle High-Traffic Areas With guests coming in and out, high-traffic areas like hallways and the living room require special attention. Here’s how to keep them spotless: Vacuum or sweep floors: Focus on areas where dirt or mud is likely to accumulate. Dust surfaces: Don’t forget shelves, light fixtures, and baseboards. Fluff cushions and throws: A neat seating area instantly elevates the ambiance. For a truly polished look, consider hiring professional house cleaners who specialize in domestic cleaning. They’ll ensure every corner of your home is guest-ready, saving you time and effort. Step 4: Deep Clean the Bathrooms Your bathrooms will undoubtedly see a lot of traffic during the holidays, so they need to be pristine. A quick wipe-down won’t suffice—this is where a deep cleaning comes in. Follow these tips for a sparkling bathroom: Scrub tiles and grout: Use a strong cleaning agent to remove stains and mold. Sanitize toilets and sinks: Pay extra attention to handles and faucets, as these are high-touch areas. Polish mirrors: A streak-free mirror instantly makes the space feel fresher. Replace towels: Provide clean, festive hand towels for your guests. Professional domestic cleaning services can tackle bathroom grime effectively, ensuring a spotless finish that leaves a lasting impression. Step 5: Freshen Up the Kitchen The kitchen is the heart of any home during Christmas. From baking cookies to carving the turkey, this space needs to be both functional and spotless. Focus on these areas: Clean appliances: Wipe down the fridge, oven, and microwave. Don’t forget the stovetop! Sanitize countertops: Use a disinfectant to keep surfaces germ-free, especially if you’re preparing food. Sweep and mop floors: Kitchen floors can quickly get dirty, so make sure they’re spotless. If you’re short on time, consider hiring house cleaners for a thorough kitchen deep cleaning, ensuring every nook and cranny is spotless. Step 6: Focus on Guest Bedrooms If you’re hosting overnight guests, their bedrooms should be clean, comfortable, and cozy. Here’s how to prepare: Wash bedding: Fresh sheets and pillowcases are a must. Dust surfaces: Include nightstands, lamps, and dressers. Vacuum thoroughly: Pay attention to corners and under the bed. Add thoughtful touches: Fresh flowers, a water carafe, or a small Christmas decoration can make the space feel extra special. For a hassle-free solution, professional housekeeping services can take care of your guest rooms, allowing you to focus on the fun aspects of hosting. Step 7: Add Finishing Touches Once your home is clean, it’s time to add those festive finishing touches that make your home feel warm and inviting: Candles and scents: Light Christmas-scented candles like cinnamon or pine to create a cozy atmosphere. Decorations: Place wreaths, fairy lights, or garlands in key areas to add a festive flair. Stock supplies: Make sure your bathrooms are well-stocked with essentials like toilet paper, soap, and hand lotion. These small details will enhance the guest experience and show that you’ve gone the extra mile to make them feel welcome. When to Call in the Professionals Cleaning your home for Christmas can be time-consuming, especially if you’re juggling other holiday preparations. This is where professional domestic cleaning and deep cleaning services come in handy. Here’s why hiring professional house cleaners is worth considering: Saves time: Focus on planning your Christmas feast or wrapping gifts while experts handle the cleaning. Ensures thoroughness: Professional cleaners have the tools and expertise to tackle even the toughest grime. Stress-free holidays: Enjoy peace of mind knowing your home is spotless and guest-ready. Whether you need a one-time deep cleaning or regular housekeeping services, professional cleaners can make your Christmas preparations a breeze. Final Thoughts Preparing your home for Christmas guests doesn’t have to be a daunting task. By following these steps, you can ensure your space is clean, cozy, and ready for the festive season. And if time is running short, don’t hesitate to call in professional house cleaners for expert domestic cleaning and deep cleaning services. A sparkling home sets the tone for a joyful Christmas celebration, leaving you free to enjoy the company of your loved ones. So, roll up your sleeves (or pick up

Read More »

Understanding Hot Water Extraction (HWE) for Carpet Cleaning

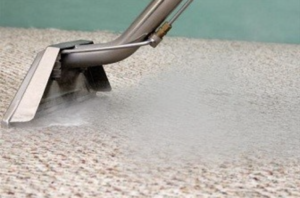
Understanding Hot Water Extraction (HWE) for Carpet Cleaning When it comes to maintaining the beauty and longevity of your carpets, professional cleaning is essential. Among the various methods available, Hot Water Extraction (HWE) often referred to as Steam Cleaning, stands out as one of the most effective and thorough techniques. In this guide, we’ll delve into what hot water extraction is, how it works, its benefits, and why it’s a preferred choice for carpet cleaners in London and across the world. What Is Hot Water Extraction? Hot water extraction is a carpet cleaning process that uses vwas at high pressure and high temperature to penetrate deep into carpet fibers. This method effectively loosens dirt, allergens, and tough stains that are embedded in the carpet. Despite being popularly called steam cleaning, the process primarily relies on hot water rather than steam. A professional carpet cleaning machine sprays water mixed with a cleaning solution into the carpet, breaking down dirt particles. The water and debris are then extracted using a powerful vacuum, leaving your carpet clean, sanitized, and fresh. How does Hot Water Extraction work , step-by-step? Here’s a step-by-step breakdown of the hot water extraction process: 1. Inspection and Pre-TreatmentCarpet cleaners begin by inspecting the carpet to identify high-traffic areas, stains, or damage. They may apply a pre-treatment solution to loosen dirt and prepare the carpet for cleaning. 2. Hot Water ApplicationUsing specialized equipment, hot water (mixed with a cleaning agent) is sprayed under high pressure into the carpet fibers. This step dissolves stubborn dirt and grime. 3. AgitationA brush or rotary machine may be used to agitate the carpet, ensuring the cleaning solution penetrates deep into the fibers. 4. ExtractionA powerful vacuum extracts the water, cleaning solution, and dirt from the carpet. This step is crucial as it prevents overwetting and speeds up drying. 5.DryingWhile hot water extraction removes most of the moisture, carpets may still feel damp. Good ventilation and airflow can speed up the drying process. Benefits of Hot Water Extraction for Carpet Cleaning Hot water extraction has numerous advantages over other carpet cleaning methods like carpet shampooing or Over The Counter (OTC) Detergents. Here’s why many homeowners and businesses choose it: Deep Cleaning This method goes beyond surface cleaning, reaching deep into the carpet pile. It removes trapped dirt, allergens, bacteria, and odors that other techniques might leave behind. Effective Stain Removal Hot water extraction is highly effective in treating tough stains. Whether it’s red wine, coffee spills, or pet accidents, the process breaks down and lifts stains from the fibers. Eco-Friendly Cleaning Modern machines use biodegradable cleaning solutions that are safe for the environment, pets, and children. Additionally, minimal chemicals are left behind after extraction. Prolongs Carpet Life Regular hot water extraction cleaning helps maintain the integrity of carpet fibers. By removing abrasive particles, it reduces wear and tear, extending the lifespan of your carpets. Ideal for Allergy Sufferers This method effectively removes allergens such as dust mites, pollen, and pet dander. It’s a great choice for homes with allergy sufferers or young children. How to Remove Carpet Stains with Hot Water Extraction Tackling stains can be tricky, but hot water extraction makes the process much simpler. Here’s how it works: Pre-Treat Stains Before starting, apply a stain remover or pre-treatment solution directly to the stain. Let it sit for a few minutes to break down the stain. Use Hot Water Extraction Equipment The high-pressure hot water targets the stained area, while the cleaning solution works to dissolve and lift the stain. Repeat for Stubborn Stains For difficult stains, such as ink or grease, multiple passes with the extraction machine may be required. Professional Expertise While DIY machines are available, professional carpet cleaners have industrial-grade equipment and expertise to handle tough stains effectively. DIY Hot Water Extraction vs. Professional Carpet Cleaning While renting a DIY steam cleaner is an option, professional carpet cleaning services deliver far better results. Here’s why: Powerful Equipment: Professional machines provide higher pressure and stronger vacuum suction, ensuring deeper cleaning and faster drying. Expert Knowledge: Trained cleaners understand how to treat different carpet materials and stains without causing damage. Convenience: Hiring carpet cleaners saves time and effort, especially for large areas or stubborn stains. Conclusion Hot water extraction is an exceptional method for achieving clean, fresh, and hygienic carpets. Its ability to remove deep-seated dirt, allergens, and tough stains makes it the go-to choice for both homeowners and businesses. Whether you’re looking to tackle stubborn spots or maintain the lifespan of your carpets, this method is a proven solution. If you’re in need of professional carpet cleaning services, contact a trusted local provider today. With hot water extraction, you can enjoy spotless carpets that look and feel like new.

Read More »

The Best Ways to Clean Silver: A Comprehensive Guide

The Best Ways to Clean Silver: A Comprehensive Guide Introduction Silver is a beautiful and timeless material often found in homes as jewelry, cutlery, decor, or heirlooms. Over time, exposure to air and moisture can cause silver to tarnish, leaving it with a dull, blackened appearance. Cleaning silver might seem daunting, but with the right methods, it can be a simple and cost-effective task. This guide will explore various ways to clean silver, the materials required, why they work, and which methods are most efficient for cost and results. Understanding Tarnish: What Causes It? Tarnish is the result of a chemical reaction between silver and sulfur-containing substances in the air, forming silver sulfide. This process naturally occurs over time but can accelerate in humid environments or when silver comes into contact with certain foods, like eggs or onions. 1. Cleaning Silver with Baking Soda and Aluminum Foil What You Need: Aluminum foil Baking soda (2-3 tablespoons) Boiling water A deep dish or bowl Soft cloth for polishing How It Works: This method relies on an electrochemical reaction. When silver touches aluminum in a baking soda solution, the tarnish (silver sulfide) transfers to the aluminum foil, restoring the silver’s shine. Line the bottom of a dish or bowl with aluminum foil, shiny side up. Place your silver items on top of the foil. Sprinkle baking soda over the items. Pour boiling water over the silver until submerged. Let it sit for 2-5 minutes, then remove and rinse with clean water. Dry and polish with a soft cloth. Efficacy and Cost Efficiency: This method is highly effective for heavily tarnished silver. The ingredients are inexpensive and readily available, making it a cost-efficient choice for regular maintenance. 2. Using Vinegar and Baking Soda What You Need: White vinegar (1 cup) Baking soda (2 tablespoons) Bowl Soft toothbrush Microfiber cloth How It Works: The acidic vinegar reacts with baking soda to create a fizzy solution that breaks down tarnish. Mix the vinegar and baking soda in a bowl. Submerge the silver items in the solution for 2-3 hours. Gently scrub with a soft toothbrush if needed. Rinse with water and polish dry. Efficacy and Cost Efficiency: This method works well for moderate tarnish but is less effective for intricate designs. The ingredients are affordable, making it budget-friendly, though the soaking time might not appeal to those seeking quicker results. 3. Polishing with Commercial Silver Cleaners What You Need: Store-bought silver polish or cleaner Soft cloth or sponge How It Works: Commercial silver cleaners contain chemical agents designed to remove tarnish and leave a protective layer on the silver surface. Apply a small amount of cleaner to a cloth or sponge. Rub the silver gently, focusing on tarnished areas. Buff with a clean section of the cloth for a brilliant shine. Efficacy and Cost Efficiency: These products are fast-acting and excellent for stubborn tarnish. However, they can be more expensive than homemade solutions and may contain harsh chemicals unsuitable for delicate or antique silver. 4. Toothpaste for Light Tarnish What You Need: Non-gel, non-abrasive toothpaste Soft toothbrush or cloth Warm water How It Works: Toothpaste acts as a mild abrasive, gently buffing away tarnish. Apply a pea-sized amount of toothpaste to a cloth or toothbrush. Rub the silver in circular motions. Rinse with warm water and dry thoroughly. Efficacy and Cost Efficiency: This is a quick and affordable option for lightly tarnished silver. Avoid using it on silver with intricate patterns, as it may not reach crevices effectively. 5. Cleaning with Lemon and Salt What You Need: Lemon juice (1 cup) Salt (1 tablespoon) Bowl of warm water Cloth or sponge How It Works: The citric acid in lemon juice dissolves tarnish, while salt enhances the cleaning process. Mix lemon juice and salt in a bowl of warm water. Soak the silver for 5-10 minutes. Wipe with a cloth or sponge, then rinse and dry. Efficacy and Cost Efficiency: This method is eco-friendly and ideal for mild tarnish. The ingredients are inexpensive but may require repeated use for heavily tarnished items. 6. Dish Soap and Warm Water for Routine Maintenance What You Need: Mild dish soap Warm water Soft cloth or sponge How It Works: This gentle cleaning method removes dirt and light tarnish. Mix a few drops of dish soap in warm water. Soak the silver briefly and gently scrub with a sponge. Rinse and dry with a soft cloth. Efficacy and Cost Efficiency: While it doesn’t tackle heavy tarnish, this is a great low-cost option for keeping silver clean on a daily basis. Comparing Methods Method Effectiveness Cost Efficiency Best For Baking Soda & Foil Excellent Very High Heavy tarnish on large items Vinegar & Baking Soda Good High Moderate tarnish Commercial Cleaners Excellent Medium Stubborn tarnish or antiques Toothpaste Moderate High Light tarnish on small items Lemon & Salt Good High Eco-friendly, light tarnish Dish Soap & Warm Water Minimal (Maintenance) Very High Routine cleaning Tips for Maintaining Silver Store Properly: Keep silver in airtight containers or anti-tarnish bags to minimize exposure to air and humidity. Use Regularly: Frequent use of silverware and jewelry can help prevent tarnish buildup. Avoid Contact with Harsh Substances: Keep silver away from chlorine, rubber, and sulfur-rich foods. Conclusion Cleaning silver at home is simple and cost-effective with the right tools and methods. For heavy tarnish, the baking soda and aluminum foil method is highly effective. For lighter tarnish, toothpaste or dish soap may suffice. Regular maintenance will keep your silver looking pristine and reduce the need for intensive cleaning.

Read More »

Is it necessary to pay for a professional End of Tenancy clean?

Do You Really Need to Pay for End of Tenancy Cleaning? Do You Need to Pay for End of Tenancy Cleaning? One of the most common questions tenants ask is whether they are legally required to pay for a professional cleaning service at the end of their tenancy. Many potential customers contact us, confused because their landlords insist that such a payment is mandatory. In this article, we’ll clarify this issue and provide tips to help you ensure you receive your full deposit back from your landlord. Is End of Tenancy Cleaning Mandatory? In short, no! Tenants cannot be obligated to hire a professional cleaning company for their move-out clean. If a tenancy agreement includes such a requirement, it is legally void and cannot be enforced. However, this doesn’t mean you should ignore the importance of cleaning your property thoroughly before moving out. To increase your chances of receiving your full deposit back, continue reading! While landlords can’t enforce payment for professional cleaning services, you must return the property in the same condition you found it (allowing for normal wear and tear). If you fail to do this, the landlord may retain part or all of your deposit to cover the costs of a professional clean. This can lead to unexpectedly high deductions from your deposit! Landlords can choose any cleaning provider they wish, often selecting the most expensive one to ensure a thorough job. To minimize their own effort and maximize rental income, they may pay a premium for same-day or next-day service. Beware: Some cleaning companies have close ties to landlords and estate agencies, charging exorbitant fees for same-day cleaning services that you’ll end up paying for if your own cleaning falls short. In fact, the costs for tenants can be significantly higher than if they had hired a cleaning service directly. For instance, while a professional cleaning for a basic two-bedroom, one-bath property might cost around £205 (the London market average), landlords often deduct over £500 from tenants’ deposits when they arrange the cleaning. Is Professional Cleaning as Easy as It Sounds? Many tenants underestimate the difficulty of cleaning to a professional standard. Specialized equipment may be necessary to tackle challenging tasks such as cleaning carpets, ovens, extractor fans, and appliances like dishwashers and washing machines. Areas that seem easy to clean, like windows, taps, and skirting boards, can be challenging to get right without the proper detergents or experience. When we founded Scrubs, we thought basic cleaning skills would suffice for End of Tenancy cleans. However, we quickly realized this is not the case! Our cleaning teams now include a Team Lead with at least five years of cleaning experience—often over ten years. Can I Save Money by Cleaning Myself? We understand that professional cleaning services can be costly! If you choose to clean your property yourself, remember that nobody can force you to hire a cleaning service. Just be sure to allocate enough time, as it often takes longer than expected. Invest in high-quality cleaning products to maximize your chances of meeting the required standards. However, be aware of the risks involved. Your landlord might skip the inventory check, but many will conduct one, especially if you rented through an estate agent. If you decide to take the DIY route, good luck! If you need advice on the best cleaning supplies, feel free to reach out to us. Benefits of Hiring a Professional Cleaning Company Choosing a professional cleaning service not only helps ensure you get your deposit back, but it also reduces your stress during what can be a hectic time. Reputable cleaning providers typically offer guarantees, promising to return if anything is missed. However, be cautious—many companies make this claim without fulfilling it. Always check reviews to ensure you choose a provider with a solid reputation to avoid having to pay for two cleaning sessions. Hiring professionals also saves you time. As discussed, achieving a professional-level clean can be time-consuming for those without experience. If you’re on a tight schedule, hiring a professional can be a wise investment. Conclusion In summary, you are not obligated to pay for a professional clean at the end of your tenancy. It’s crucial to know your rights—any requirement added to a contract is void. However, if the property is not returned in good condition, landlords may use your deposit to cover cleaning costs, often at rates significantly higher than necessary. Therefore, we recommend doing your research and hiring a well-reviewed End of Tenancy cleaning specialist. This choice is likely to save you time, money, and a lot of stress!

Read More »

9 easy time saving tips and tricks

9 time-saving tips & tricks Being a parent has been the best thing that’s ever happened to me but also at times made it feel as though I never have time for myself. In our household, both my husband and I work full time, meaning life’s pretty hectic. Over the last few years, we’ve created a system that’s helped us tremendously, so we can spend more time doing things we love like playing with the kids. Here are 9 tips for efficient time management, reducing stress, and cherishing family moments. They’ve really helped us and I hope they really help you too!   1. Think positive! Don’t use sentences such as “I am so stressed” or “I don’t have time for anything”, as those thoughts only make you more stressed. You need to accept that everyone has the same hours in the day and figure out the right balance so enough time is allocated to the things that are important to you.   2. Create a to-do list every day, or a rolling to-do list if that works better for you. Your phone is an excellent place to keep you list, as you’ll always have it with you. You can divide the list into different categories such as Do, Delegate, Differ, and Dump; and always remember that you need family and personal time. An hour on the sofa to relax can be as important as anything else!   3. Multitask routine activities. For example, you might go for a walk and make phone calls simultaneously. That being said, if something is particularly important to you, you shouldn’t full bad in giving it your full and undivided attention.   4. Share household responsibilities between all family members. Even small children can have some jobs, such as making their beds, unloading the dishwasher, or packing their bags for the following day before bed. One thing we do is create a chart showing the different jobs each member must perform and make it visible to all family members will help. We found that by showing our excitement in completing our tasks then the kids would be eager to do there’s as well.   5. Weekly planning. Every Sunday, we review the week ahead. It is good practice to have your own calendar and a family calendar. For the family calendar, you could use a paper calendar in the kitchen or a digital calendar to synchronize family schedules, such as appointments or extracurricular activities.   6. Breakdown big tasks into steps. This is as valid when looking at work and household tasks. E.g., if you must declutter a very messy room, don’t feel bad to do a bit each day for a week rather than try a cram it all into one.   7. Plan meals. If you struggle to create nutritional and easy meals, there are good meal planning apps to help you, which automatically create grocery lists. You can also do your shopping online, rather than going in store. Think how much prep you need to do for each meal and do as much prep as you can during the weekend.   8. If you’re having a quiet day, why not do some bulk cooking. Make the most of the freezer so you can save them for times when you don’t have time to cook. For example, if you come home late after extracurricular activities or a long working day. Also, doing this means you are less likely to eat impulsively whilst saving money on take outs.   9. If you have some spare income available, look at outsourcing time-consuming tasks. Housekeeping and cleaning are examples of time-consuming activities that can be outsourced relatively cheaply. A good professional house cleaning or housekeeping service will help you to focus on your family and your job.   This article was written by Maria, one of our longest serving cleaners at Scrubs Cleaning.   If you are interested in our housekeeping services to save you time, why not Contact Us to see how we can help! 

Read More »
Which clean are you interested in?