Scrubs Logo

CONTACT US: 020 8146 8571
London's #1 End of Tenancy Specialists
CONTACT US: 020 8146 8571
London's #1 End of Tenancy Specialists

Blog

Deep Cleaning Every Room in the House

Deep Cleaning Every Room in the House Deep cleaning your home goes beyond regular tidying and surface cleaning. It involves tackling hidden dirt, dust, and grime to create a healthier and more comfortable living space. Below, we provide a detailed guide on how to deep clean different rooms in your house, along with useful tips and recommended cleaning products. 1. Kitchen The kitchen is one of the most-used areas in a home and requires special attention. Declutter and Organize Remove all items from countertops, cabinets, and drawers to clean every surface thoroughly. Discard expired food, spices, and items you no longer use to free up space. Organize utensils, cookware, and pantry items efficiently by grouping similar items together and using storage containers or dividers. Clean Appliances Refrigerator & Freezer: Remove all food, wipe down shelves with warm, soapy water, and clean the exterior with a stainless steel or multipurpose cleaner. Vacuum or wipe down the coils at the back. Oven & Stovetop: Use a degreaser for built-up grease, clean oven racks by soaking them in warm, soapy water, and scrub burner grates. Microwave: Heat a bowl of water with lemon juice for 5 minutes. The steam will loosen any food splatters which can then be easily wiped off. Dishwasher: Run an empty cycle with vinegar to remove residue and odours. Clean the filter and wipe the rubber seals. Small Appliances: Wipe down coffee makers, toasters, and blenders. Remove crumbs from toasters and clean blender blades properly.   Surfaces & Cabinets Wipe down all cabinet doors and handles with a degreaser or mild cleaner to remove fingerprints and stains. Scrub countertops and backsplash with an appropriate cleaner to remove food stains and bacteria. Disinfect sink and faucets using a baking soda and vinegar mixture. Let it sit for 10 minutes before scrubbing.   Floors & Trash Area Sweep and mop floors thoroughly, paying attention to corners and under appliances. Clean and sanitize trash bins inside and out. Use baking soda to neutralize odours.   Sink & Drain Maintenance Scrub the sink with baking soda and rinse with vinegar. Pour boiling water down the drain to clear debris. Use a disinfectant spray to sanitize the faucet and handles.   Recommended Products: Method Anti-Bac Kitchen Cleaner Krud Kutter Degreaser Dr. Beckmann Service-it Deep Clean for Dishwashers 2. Living Room A deep-cleaned living room feels fresh and inviting. Declutter and Organize Remove unnecessary items such as old magazines, unused decor, and clutter from tables and shelves. Dust and organize bookshelves, TV stands, and entertainment units by categorizing items logically.   Upholstery & Fabrics Vacuum couches, chairs, and cushions, using an upholstery attachment to remove dust and pet hair. Spot-clean stains on fabric surfaces using an appropriate cleaner. Wash or dry-clean curtains and throw blankets to remove accumulated dust. Clean lampshades and decorative pillows by vacuuming or using a lint roller.   Surfaces & Electronics Wipe down tables, shelves, and entertainment centres with a microfiber cloth and wood or glass cleaner. Clean TV screens and remote controls using a microfiber cloth and a solution of equal parts water and rubbing alcohol.   Floors & Windows Vacuum carpets and use a steam cleaner if possible to remove deep-seated dirt. Mop hardwood or tile floors with an appropriate cleaner. Clean windows and window sills with a glass cleaner. Dust blinds and wash curtains.   Recommended Products: Vax Carpet Cleaner HG Glass & Mirror Cleaner Dettol Antibacterial Surface Wipes 3. Bedroom Your bedroom should be a sanctuary of cleanliness and relaxation. Declutter & Organize Sort and organize clothing, shoes, and accessories. Use storage bins for seasonal clothing. Donate or discard items you no longer use to keep your space tidy.   Bedding & Mattress Wash all bedding, including sheets, pillowcases, comforters, and mattress protectors in hot water. Vacuum and flip the mattress to prevent dust mites and extend its lifespan. Wipe down headboards and bed frames with a damp cloth. Freshen pillows by placing them in the dryer with a few tennis balls.   Furniture & Surfaces Dust and polish nightstands, dressers, and desks using a microfiber cloth and wood cleaner. Clean mirrors with glass cleaner to remove fingerprints and streaks. Organize personal items and discard unnecessary clutter.   Floors & Closets Vacuum carpets and mop hard floors, paying attention to under the bed and furniture. Organize closets by sorting clothing into categories. Dust shelves and clean storage boxes.   Recommended Products: Lenor Fabric Freshener Astonish Antibacterial Surface Cleaner Dyson V15 Detect Vacuum Cleaner 4. Bathroom The bathroom requires regular deep cleaning to maintain hygiene. Shower & Bathtub Scrub tiles, grout, and shower walls with a mould-removing cleaner or a paste made of baking soda and water. Clean glass doors with vinegar and baking soda to remove hard water stains. Remove and wash shower curtains or replace liners to prevent mildew buildup.   Sink & Countertops Scrub the sink with a disinfectant and a non-abrasive scrubber. Wipe down countertops and clean toothbrush holders with warm, soapy water.   Toilet & Floors Scrub the toilet inside and out, including the base and flush handle, using a toilet brush and disinfectant. Mop the floors with a disinfectant cleaner and scrub tile grout as needed.   Storage & Ventilation Declutter medicine cabinets and throw away expired products. Clean and replace air vents or exhaust fans to improve airflow.   Recommended Products: Viakal Limescale Remover The Pink Stuff Bathroom Paste Astonish Mould & Mildew Remover 5. Laundry Room Laundry rooms can gather lint, dust, and detergent residue. Washer & Dryer Clean washer drum with a cycle of vinegar and baking soda to remove detergent buildup. Remove lint from dryer vents and filters to prevent fire hazards.   Storage & Organization Organize detergents, softeners, and cleaning supplies neatly on shelves. Wipe down shelves and cabinets to remove dust and spills.   Floors & Surfaces Sweep and mop the floor thoroughly, paying attention to corners. Wipe down countertops and appliances to remove dust and lint.   Recommended Products: Afresh Washing Machine Cleaner (to

Read More »

Curtains and Blinds – how to keep them clean

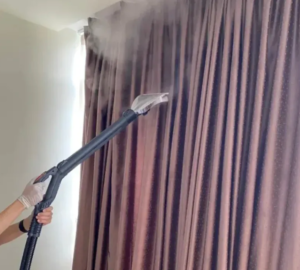
Curtains and Blinds – how to keep them clean Curtains and blinds are essential elements of home decor, offering both style and functionality. Over time, they accumulate dust, allergens, and stains, making regular cleaning crucial. This guide will explore the best methods to clean different types of curtains and blinds to maintain their freshness and longevity. Cleaning Different Types of Curtains Machine-Washable Curtains Many fabric curtains are machine-washable, making them easy to clean. Always check the care label for specific instructions. Use a gentle cycle with cold water and mild detergent to prevent shrinking or fading. Hang them to dry to avoid damage from high heat. Hand-Wash Only Curtains Delicate fabrics such as silk or lace require hand washing. Fill a basin with lukewarm water and a mild detergent. Gently agitate the curtains, rinse thoroughly, and lay them flat to dry. Avoid wringing them out, as this can distort the fabric. Dry-Clean Only Curtains Some curtains, especially those made from heavy or lined fabrics, require professional dry cleaning. Attempting to wash them at home can lead to shrinkage or damage. Always follow the manufacturer’s guidelines. Steam Cleaning Curtains For a quick refresh, steam cleaning is an effective option. A handheld steam cleaner can remove dust, bacteria, and odours without taking the curtains down. Hold the steamer at a safe distance to prevent excessive moisture from soaking the fabric. Cleaning Different Types of Blinds Blinds come in various materials, each requiring a unique cleaning approach. Here’s how to clean different types of blinds effectively: Wooden Blinds Wooden blinds add warmth and elegance to a home but require special care. Avoid excessive moisture, which can cause warping. Instead, use a microfiber cloth or duster to remove dust regularly. For deeper cleaning, wipe with a slightly damp cloth and mild wood cleaner. Faux Wood Blinds Faux wood blinds offer the look of real wood but are more moisture-resistant. They can be cleaned with a damp cloth and mild soap. For stubborn stains, a vinegar-water solution works well without damaging the finish. Aluminium Blinds Aluminium blinds are lightweight and durable. Dust them regularly with a microfiber cloth or vacuum using a brush attachment. For a deep clean, remove the blinds and soak them in a bathtub with warm water and dish soap. Rinse thoroughly and let them air dry before reinstalling. Vinyl or Plastic Blinds Vinyl blinds are easy to maintain. Dusting regularly prevents buildup, while a damp sponge with mild detergent can remove grime. For a thorough clean, remove and wash them in a bathtub, then dry completely before hanging back up. Fabric Blinds (Roman & Roller Blinds) Fabric blinds require gentle cleaning to avoid damage. Vacuum them with an upholstery attachment or spot-clean stains with a fabric-safe cleaner. If the fabric is removable, follow the manufacturer’s washing instructions. Venetian Blinds Venetian blinds, made from wood, aluminium, or PVC, are known for their horizontal slats, which can easily accumulate dust. To clean them, use a microfiber cloth or a specialized blind duster to remove dust regularly. For a deeper clean, wipe each slat with a damp cloth and mild detergent. If they are made of wood, avoid excessive moisture to prevent warping. A vacuum with a brush attachment can also help maintain their cleanliness. Best Cleaning Products for Curtains and Blinds Microfiber cloths – Ideal for dusting and wiping down blinds without scratching surfaces. Vacuum with brush attachment – Perfect for fabric blinds and curtains. Mild detergent – Safe for most fabric types. White vinegar solution – Effective for removing stains and disinfecting surfaces. Steam cleaner – A quick and chemical-free way to freshen up curtains. Maintenance Tips Dust blinds weekly to prevent buildup. Wash or dry clean curtains seasonally. Avoid excessive moisture on wooden blinds. Use a dehumidifier to prevent mould growth on fabric curtains. Conclusion Regular cleaning of curtains and blinds not only enhances their appearance but also improves indoor air quality. By following the appropriate cleaning methods for each material, you can prolong their lifespan and maintain a fresh, hygienic home environment. Whether using simple dusting techniques or deep-cleaning methods, keeping window treatments clean is an essential part of home maintenance. Please contact Scrubs Cleaning if you need to deep clean your house, including steam clean of curtains and carpets.

Read More »

The Health Issues of Mould and How to Remove It

The Health Issues of Mould and How to Remove It Mould is a common household problem that can have serious health implications if left untreated. It thrives in damp, poorly ventilated areas, growing on walls, ceilings, carpets, and even furniture. Exposure to mould can cause a variety of health issues, especially for those with respiratory conditions, allergies, or weakened immune systems. Understanding the dangers of mould and learning effective ways to remove it is essential for maintaining a healthy living environment. Health Issues Caused by Mould Mould releases tiny spores into the air, which can be inhaled and lead to various health problems. Some of the most common health issues associated with mould exposure include: Respiratory Problems Mould spores can trigger respiratory issues, particularly in individuals with asthma or chronic obstructive pulmonary disease (COPD). Symptoms include coughing, wheezing, shortness of breath, and throat irritation. Long-term exposure can worsen these conditions and increase the risk of lung infections. Allergic Reactions Mould is a known allergen, and exposure can lead to allergic reactions in sensitive individuals. Symptoms include sneezing, runny nose, itchy eyes, and skin rashes. Those with pre-existing allergies or hay fever are more likely to experience these effects. Weakened Immune System People with weakened immune systems, such as the elderly, infants, or those undergoing chemotherapy, are particularly vulnerable to mould-related illnesses. Mould exposure can lead to serious infections in these individuals, making it crucial to prevent and remove mould promptly. Skin Irritations and Rashes Direct contact with mould or contaminated surfaces can cause skin irritations, redness, and rashes. Some people may develop more severe reactions, including hives or eczema flare-ups. Neurological Symptoms Certain types of mould, such as black mould (Stachybotrys chartarum), produce mycotoxins that can affect the nervous system. Symptoms of prolonged exposure may include headaches, dizziness, memory problems, and difficulty concentrating. Sinus Infections Mould spores can irritate the sinuses, leading to sinus infections or chronic sinusitis. Symptoms include nasal congestion, facial pain, and headaches, which can persist if the mould problem is not addressed. How to Remove Mould Removing mould effectively requires proper cleaning techniques and preventive measures to ensure it does not return. Here are some steps to eliminate mould from your home: Identify the Source of Moisture Mould thrives in damp environments, so the first step is to identify and address the source of moisture. Common causes include leaky pipes, condensation, roof leaks, and poor ventilation. Fixing these issues will help prevent mould from returning. Wear Protective Gear Before cleaning mould, wear protective gear such as gloves, a mask, and goggles to avoid direct contact with spores. Open windows and doors for ventilation while cleaning. Use Household Cleaning Solutions Several cleaning solutions can effectively remove mould: White Vinegar – A natural and effective mould killer, vinegar can be sprayed directly onto affected areas and left for an hour before wiping. Baking Soda – Mix baking soda with water and scrub the mouldy surface. This also helps absorb moisture and prevent mould regrowth. Hydrogen Peroxide – A powerful antifungal agent, hydrogen peroxide can kill mould and disinfect surfaces. Bleach – While effective, bleach should be used with caution as it can produce toxic fumes. Mix with water and apply to non-porous surfaces.   Scrub and Remove Mould Using a scrub brush or sponge, scrub the affected area thoroughly. For stubborn mould, repeat the process or use a stronger cleaning solution. Dry the Area Completely After cleaning, ensure the area is completely dry to prevent mould from returning. Use fans, dehumidifiers, or open windows to improve air circulation. Dispose of Contaminated Materials If mould has penetrated porous materials such as carpets, drywall, or furniture, it may be necessary to dispose of them to prevent further contamination. Prevent Future Mould Growth Improve ventilation by using exhaust fans in bathrooms and kitchens. Use a dehumidifier to reduce indoor humidity levels. Regularly clean and inspect damp areas such as basements, bathrooms, and kitchens. Fix leaks promptly and ensure gutters and downspouts direct water away from your home. Best Mould Removal Products If household remedies are not enough, several commercial mould removers can help tackle stubborn infestations: HG Mould Spray – An effective spray that removes black mould from bathrooms and other damp areas. Astonish Mould & Mildew Remover – A bleach-based cleaner that quickly eliminates mould and mildew. Dettol Mould & Mildew Remover – Kills 99.9% of bacteria and mould, leaving surfaces clean and sanitised. Cillit Bang Black Mould Remover – Penetrates deep into mould to remove even the toughest stains. Ecozone Mould Remover – A natural, eco-friendly option for those sensitive to harsh chemicals. When to Call a Professional In some cases, mould infestations may be too severe to handle alone. If you notice extensive mould growth, a persistent musty smell, or health symptoms worsening, it is best to call a professional mould remediation service. Experts have specialised equipment and knowledge to remove mould safely and prevent future outbreaks. Conclusion Mould is more than just an unsightly problem—it poses serious health risks and can cause long-term damage to your home. Respiratory issues, allergic reactions, and even neurological symptoms can arise from prolonged mould exposure. Thankfully, by identifying the source of moisture, using effective cleaning techniques, and maintaining proper ventilation, mould growth can be controlled and prevented. Whether using household remedies or commercial cleaning products, taking swift action against mould will ensure a healthier and safer living environment for you and your family. For a deep clean of your house, which will avoid the creation of mould please call Scrubs Cleaning.

Read More »

How to Deep Clean a House with Pets

How to Deep Clean a House with Pets Keeping a house clean with pets can be challenging, but regular deep cleaning is essential for maintaining a healthy home for both you and your furry friends. Pet hair, dander, odours, and the occasional mess can accumulate quickly, making it necessary to adopt a thorough cleaning routine. This guide will walk you through the steps to effectively deep clean your home while ensuring your pets remain safe and comfortable. Gather Your Cleaning Supplies Before you begin deep cleaning, gather the right pet-safe cleaning supplies. Some essential items include: A vacuum cleaner with a pet hair attachment A lint roller or pet hair remover Pet-safe disinfectant sprays and wipes Baking soda and vinegar for natural cleaning Microfiber cloths Enzyme-based stain removers Air purifiers or odour neutralizers   Recommended Cleaning Products: Nature’s Miracle Stain & Odor Remover – Great for tackling pet messes with an enzyme-based formula. Bissell Pet Hair Eraser Vacuum – Specifically designed for pet owners, effectively removes hair and dander. Angry Orange Pet Odor Eliminator – A powerful odour neutralizer that is safe for pets. FUR Remover Broom – A rubber broom that effectively gathers pet hair from carpets and floors.   Make sure any cleaning products you use are non-toxic and safe for pets, as some common household cleaners contain harmful chemicals. Remove Pet Hair from Surfaces Pet hair can accumulate on floors, furniture, and fabrics. Here’s how to tackle it effectively: Vacuum thoroughly: Use a vacuum with a HEPA filter and pet hair attachment to remove fur from carpets, rugs, and upholstery. Use a lint roller: For furniture, clothing, and smaller surfaces, a lint roller or pet hair brush works wonders. Damp microfiber cloth: Wipe down hard surfaces like tables, baseboards, and countertops to capture stray hairs.   Regularly grooming your pets can also reduce shedding and minimize the amount of hair in your home. Wash Pet Bedding and Accessories Your pet’s bed, blankets, and toys can harbour dirt, bacteria, and odours. Wash these items regularly: Machine wash pet bedding and blankets with fragrance-free detergent. Clean pet toys by soaking them in warm, soapy water and rinsing thoroughly. Wipe down food and water bowls with pet-safe disinfectant to prevent bacteria buildup.   Consider using washable covers for pet beds to make cleaning easier. Clean Floors and Carpets Floors collect pet hair, dander, and dirt, so it’s essential to give them a deep clean: Hard floors: Sweep first to remove loose debris, then mop with a pet-safe cleaner. Avoid ammonia-based cleaners, as they can mimic the scent of urine and encourage accidents. Carpets and rugs: Vacuum thoroughly and use an enzyme-based cleaner to remove pet stains. Steam cleaning can also help eliminate deep-set odours and bacteria.   Recommended Cleaning Products: Folex Instant Carpet Spot Remover – Works well on pet stains without leaving residue. Hoover SmartWash Pet Carpet Cleaner – A deep-cleaning carpet cleaner designed for homes with pets. Eliminate Odours Pet odours can linger in carpets, furniture, and air. Here’s how to keep your home smelling fresh: Baking soda: Sprinkle baking soda on carpets and upholstery, let it sit for 15 minutes, and vacuum it up to absorb odours. Air purifiers: Use an air purifier with a HEPA filter to remove pet dander and allergens from the air. Odour neutralizers: Avoid synthetic air fresheners and opt for pet-friendly odour eliminators.   Regular ventilation by opening windows can also help improve air quality. Deep Clean Furniture and Upholstery Pet fur and dander can settle into couches, chairs, and curtains. Here’s how to clean them: Vacuum upholstery: Use a vacuum with a brush attachment to remove embedded hair and dirt. Wash covers: If your furniture has removable covers, wash them in the washing machine with mild detergent. Spot clean stains: Use an enzyme-based stain remover for pet-related messes and blot (don’t rub) the affected area.   Recommended Cleaning Products: Scotchgard Fabric & Upholstery Cleaner – Helps clean and protect furniture from pet stains. Sanitize Pet Areas Deep cleaning isn’t just about removing hair and odours—it’s also about keeping your pet’s space germ-free: Litter box: Empty and scrub with warm water and pet-safe soap. Replace litter regularly to prevent odours. Crates and carriers: Wipe down the inside and wash removable mats or cushions. Feeding area: Clean food and water bowls daily to prevent bacteria buildup. Address Stains and Accidents Pet accidents happen, and it’s important to clean them properly to prevent lingering odours and stains: Blot up urine with paper towels and avoid rubbing, which can spread the stain. Apply an enzyme-based cleaner to break down the proteins in pet urine. Use a UV light to locate hidden stains and ensure thorough cleaning. Keep Your Home Clean Between Deep Cleans To maintain cleanliness and reduce the need for frequent deep cleans, establish a regular routine: Brush and bathe your pets regularly to minimize shedding and odours. Wipe their paws after walks to prevent dirt from being tracked inside. Vacuum and dust frequently to remove allergens and pet dander. Wash pet accessories and bedding on a consistent schedule. Conclusion Deep cleaning a house with pets requires extra effort, but it’s essential for maintaining a hygienic and odour-free home. By using pet-safe cleaning products, staying on top of pet hair and dander, and establishing a cleaning routine, you can create a fresh and healthy environment for both you and your furry companions. With these steps, your home will stay clean, comfortable, and welcoming for both humans and pets alike. If you’re struggling or just don’t have time to remove the pet hair from your home, you can also contact us for a Deep Clean Quote which would take care of it all for you

Read More »

Green Cleaning Products vs. Chemical-Based Cleaning Products

Green Cleaning Products vs. Chemical-Based Cleaning Products Cleaning products play a vital role in maintaining hygiene and a healthy environment in homes, workplaces, and public spaces. In recent years, there has been a significant shift towards green cleaning products as people become more environmentally conscious. However, traditional chemical-based cleaning products still dominate the market due to their powerful disinfecting properties. This blog explores the advantages and disadvantages of both green and chemical-based cleaning products, helping consumers make informed choices about the products they use. Advantages of Green Cleaning Products 1. Environmentally Friendly One of the main reasons people switch to green cleaning products is their positive impact on the environment. Unlike conventional chemical cleaners, green products are made from biodegradable ingredients that do not contribute to water or air pollution. Many eco-friendly brands use sustainable packaging, further reducing environmental waste. 2. Safer for Human Health Green cleaning products are typically free from harsh chemicals such as ammonia, chlorine, and phthalates, which can cause respiratory issues and skin irritation. This makes them a safer choice for households with children, pets, and individuals with allergies or sensitivities to strong chemicals. 3. Reduced Indoor Air Pollution Traditional cleaning products often release volatile organic compounds (VOCs) that contribute to indoor air pollution and can trigger asthma or other respiratory problems. Green cleaners, on the other hand, are formulated to minimize these harmful emissions, improving indoor air quality. 4. Pleasant, Natural Scents Unlike chemical cleaners that rely on synthetic fragrances, green cleaning products often use essential oils or plant-based ingredients for a natural, pleasant scent. This makes them a preferable option for people who are sensitive to artificial perfumes. 5. Sustainable Sourcing Many eco-friendly cleaning brands prioritize sustainable ingredient sourcing. They often use plant-derived substances that are renewable, reducing the environmental footprint of their products compared to petroleum-based cleaners. Disadvantages of Green Cleaning Products 1. Higher Cost Green cleaning products tend to be more expensive than conventional cleaners due to the cost of natural ingredients and eco-friendly manufacturing processes. This can be a deterrent for budget-conscious consumers. 2. Less Powerful Disinfecting Properties While green cleaning products are effective at removing dirt and grime, they may not be as powerful at killing bacteria, viruses, and mould as chemical-based disinfectants. For households that require heavy-duty sanitization, such as those with individuals who have weakened immune systems, green cleaners may not always be sufficient. 3. Shorter Shelf Life Because green cleaning products are made without artificial preservatives, they often have a shorter shelf life than chemical-based cleaners. This can lead to more frequent purchases, further increasing overall costs. 4. Limited Availability Although eco-friendly products are becoming more mainstream, they are still not as widely available as traditional chemical cleaners. Certain specialized green products may only be found in specific stores or online retailers, making them less convenient to purchase. Some of the best Green Cleaning Products If you’re looking for some of the best green cleaning products available, here are a few top-rated options: Method All-Purpose Cleaner – A plant-based cleaner that effectively removes dirt and grime while being safe for most surfaces. Ecover Multi-Surface Cleaner – Biodegradable and non-toxic, ideal for everyday cleaning. Seventh Generation Disinfecting Wipes – Made with botanical ingredients, these wipes kill germs without harmful chemicals. Ecozone Bathroom Cleaner – Perfect for tackling limescale and soap scum without harsh fumes. Dr. Bronner’s Sal Suds Biodegradable Cleaner – A concentrated, all-purpose cleaner made from plant-based ingredients. Better Life Natural All-Purpose Cleaner – A non-toxic option that effectively cuts through grease and grime. Attitude Eco-Friendly Window & Glass Cleaner – Streak-free and ammonia-free for crystal-clear surfaces. Advantages of Chemical-Based Cleaning Products 1. Stronger Cleaning Power Chemical-based cleaning products are formulated with powerful disinfectants that effectively kill bacteria, viruses, and fungi. This makes them highly effective in places that require strict hygiene standards, such as hospitals, commercial kitchens, and public restrooms. 2. Cost-Effective Traditional cleaning products are often more affordable than their eco-friendly counterparts. Since they are mass-produced and rely on inexpensive synthetic ingredients, they are more budget-friendly for households and businesses alike. 3. Longer Shelf Life Chemical-based cleaners typically have a longer shelf life due to the presence of preservatives and stabilizing agents. This makes them a convenient option for bulk purchases and long-term storage. 4. Readily Available Unlike green cleaning products, which may be limited to specialty stores, chemical cleaners are widely available in supermarkets, convenience stores, and even local corner shops. Their accessibility makes them a practical choice for many consumers. 5. Specialized Formulations Many chemical-based cleaning products are designed for specific tasks, such as oven cleaning, tile whitening, and mould removal. These targeted formulations provide superior results for heavy-duty cleaning jobs that green products may struggle to handle. Disadvantages of Chemical-Based Cleaning Products 1. Health Risks Many chemical-based cleaners contain harsh substances like ammonia, chlorine, and phthalates, which can cause respiratory problems, skin irritation, and allergic reactions. Prolonged exposure may even lead to more serious conditions such as asthma or hormonal disruptions. 2. Environmental Pollution Chemical cleaners often contain non-biodegradable ingredients that contaminate water sources and harm aquatic life. When washed down the drain, these chemicals can persist in the environment, contributing to water and soil pollution. One important group of air pollutants are Volatile Organic Compounds (VOCs), which can impact health. 3. Surface Damage Harsh chemical cleaners, such as bleach-based products, can degrade certain surfaces over time. They may cause discoloration, corrosion, or weakening of materials like wood, fabrics, and even some types of stone countertops. 4. Safety Concerns Many chemical cleaners are highly flammable or reactive when mixed with other substances, such as bleach and ammonia, which produce toxic gases. Accidental ingestion or contact with these chemicals can be dangerous, particularly in households with children and pets. Some of the best Chemical-Based Cleaning Products For those who prefer traditional cleaning solutions with powerful disinfecting properties, here are some of the best chemical-based cleaning products: Dettol Antibacterial Surface Cleaner – Kills 99.9% of bacteria and viruses, ideal for high-touch surfaces. Lysol

Read More »

Some of the best Cleaning Products on the Market

Some of the best Cleaning Products on the Market A clean home not only looks great but also contributes to a healthier and more comfortable living environment. With so many cleaning products available, choosing the right ones can be overwhelming. While chemical-based products may provide quicker and more intense cleaning, eco-friendly alternatives have proven to be effective, safer, and more sustainable. With advancements in green technology, plant-based cleaners are becoming just as powerful as traditional options without the associated health and environmental risks. Here, we explore twelve of the best cleaning products on the market in the UK, each designed to tackle specific household cleaning needs effectively. There are a mixture of chemical-based and eco-friendly products. 1. Dettol Antibacterial Surface Wipes Dettol Antibacterial Surface Wipes are a must-have for quick and easy cleaning. These pre-moistened wipes kill 99.9% of bacteria and viruses, making them perfect for high-touch surfaces like doorknobs, countertops, and remote controls. They are convenient, disposable, and come in various scents, leaving your home smelling fresh while keeping it germ-free. 2. Method All-Purpose Cleaner For an eco-friendly yet powerful cleaning solution, Method All-Purpose Cleaner is a great choice. Made from plant-based ingredients, this cleaner effectively removes dirt and grime without harsh chemicals. It is safe for most surfaces, including wood, glass, and stone, making it a versatile option for daily use. 3. Cif Cream Cleaner Cif Cream Cleaner is a household staple known for its ability to tackle stubborn dirt, grease, and grime. Its thick formula contains micro-particles that help remove tough stains from kitchen counters, sinks, and bathroom surfaces. It’s gentle yet highly effective on a variety of surfaces, making it a go-to cleaning product. 4. The Pink Stuff The Pink Stuff is a multipurpose cleaning paste known for its ability to remove tough stains, rust, and grime. It works wonders on stainless steel, ceramic, porcelain, and even glass surfaces. Whether you’re polishing cookware or restoring an old sink, this cleaner delivers impressive results. 5. Fairy Liquid Fairy Liquid is more than just a dishwashing liquid. Its grease-cutting power makes it ideal for cleaning kitchen appliances, removing oil stains from clothes, and even washing pets safely. The original formula is particularly popular due to its ability to break down stubborn grease and grime. 6. Flash Magic Eraser The Flash Magic Eraser is a game-changer for removing stubborn stains and marks. Whether it’s scuff marks on walls, grease buildup on kitchen appliances, or soap scum in the bathroom, this product works with just water and a bit of scrubbing. Its micro-scrubbing technology lifts away tough stains effortlessly. 7. Bona Hardwood Floor Cleaner Keeping hardwood floors in top condition requires a specialized cleaner, and Bona Hardwood Floor Cleaner delivers excellent results. This water-based formula cleans without leaving residue or damaging the wood. Its pH-neutral solution ensures safe and effective cleaning, making it a go-to product for wood flooring maintenance. 8. Dr. Beckmann Carpet Stain Remover For tackling tough carpet stains, Dr. Beckmann Carpet Stain Remover is an excellent solution. Equipped with a built-in brush applicator, this cleaner works deep into carpet fibres to remove food stains, pet messes, and dirt. It’s a must-have for households with carpets and rugs that require frequent maintenance. 9. Harpic Power Plus Toilet Cleaner For a sparkling clean and disinfected toilet, Harpic Power Plus Toilet Cleaner is a trusted choice. Its thick formula clings to the toilet bowl, removing stains, limescale, and bacteria effectively. The angled neck makes it easy to apply under the rim, ensuring a thorough clean with every use. 10. Krud Kutter Original Cleaner Degreaser Krud Kutter Original Cleaner Degreaser is an effective, non-toxic cleaning solution designed to tackle the toughest grease and grime. It works on multiple surfaces, including kitchen appliances, countertops, and even outdoor furniture. Its biodegradable formula makes it a safer alternative to harsh chemical degreasers. Whether you need to remove oil stains, baked-on food, or sticky residues, Krud Kutter provides a powerful clean while being safe for use around pets and children. 11. Astonish Mould & Mildew Remover Astonish Mould & Mildew Remover is one of the best products for tackling stubborn mould and mildew. Ideal for bathrooms, kitchens, and damp-prone areas, this powerful formula removes black mould and prevents regrowth. It requires minimal scrubbing, making it an excellent choice for deep-cleaning tasks. 12. HG glass and mirror cleaner HG Glass and Mirror Cleaner is a highly effective solution for achieving streak-free shine on windows, mirrors, and glass surfaces. Its powerful formula effortlessly removes grease, fingerprints, and dust, leaving glass surfaces crystal clear. Unlike many glass cleaners, it dries quickly without leaving streaks or smudges. Suitable for both household and professional use, HG Glass and Mirror Cleaner is easy to apply with a spray and wipe method. It is ammonia-free, making it safe for regular use while maintaining a spotless and polished look in your home or workspace. Conclusion Choosing the right cleaning products can make a significant difference in maintaining a clean and healthy home. From antibacterial wipes to eco-friendly detergents, these twelve products stand out for their effectiveness, ease of use, and availability in the UK. Whether tackling daily messes or deep-cleaning stubborn stains, these top-rated cleaners ensure your home stays spotless and fresh. Please contact Scrubs Cleaning if you need a deep clean of your whole house. We use the most effective products on the market in all our cleans.

Read More »

Important Connections Between Cleanliness and Health

Important Connections Between Cleanliness and Health Living in a clean space is vitally important for our overall health and well-being. Whether it be Covid, Monkeypox or Norovirus, hospitals across London and the wider UK have been inundated with patients suffering from viruses and diseases. Every year, thousands of British people suffer from preventable food poisoning. Finally, we are in a mental health epidemic, where a clean and organised environment has a profound impact. In this blog, we will be looking at these three connections between cleanliness and health in more detail, with the hope of demonstrating the importance of living in a clean space. Preventing the Spread of Diseases A clean house is crucial in safeguarding the health of its occupants and preventing the spread of illnesses. By maintaining a hygienic environment, households can minimise the presence of harmful bacteria, viruses, allergens, and other contaminants that pose health risks. Reducing Germ Hotspots: Germs thrive in frequently touched areas such as doorknobs, light switches, remote controls, and countertops. Regular cleaning and disinfection of these high-touch surfaces significantly reduce the risk of transmitting infectious diseases like colds, flu, and stomach viruses. Using disinfectant sprays or wipes ensures these areas remain germ-free. Improving Indoor Air Quality: Dust, pet dander, and mould spores accumulate in homes, negatively impacting air quality. These pollutants can trigger allergies and respiratory problems such as asthma. Regular dusting, vacuuming (preferably with a HEPA filter), and keeping air vents clean promote healthier air circulation, reducing respiratory irritation. Minimizing Mold Growth: Mold thrives in damp areas, such as bathrooms and basements, and can cause health issues ranging from mild allergic reactions to severe respiratory conditions. Keeping these areas dry, using dehumidifiers, and cleaning mold-prone surfaces regularly prevents its growth. Preventing Pest Infestations: Unclean spaces, food crumbs, and clutter can attract pests such as cockroaches, rodents, and ants. These pests carry diseases like salmonella and hantavirus. Ensuring proper waste disposal, sealing food containers, and cleaning up spills promptly can help deter pest infestations and protect household health. Encouraging Healthy Habits: A clean home fosters better hygiene practices among its occupants, such as regular handwashing and tidying up after themselves. These habits collectively contribute to a healthier environment. Cleanliness and Food Safety Maintaining a clean environment is essential for preventing contamination and ensuring the safety of food. Poor hygiene practices can lead to the proliferation of harmful bacteria, viruses, and other pathogens, increasing the risk of foodborne illnesses. Kitchen Hygiene: The kitchen is a critical area where cleanliness directly impacts food safety. Surfaces, utensils, and appliances used for food preparation must be thoroughly cleaned to prevent cross-contamination. For example, cutting boards used for raw meat should not be used for fresh produce without proper sanitization. Regularly cleaning countertops, sinks, and appliances like microwaves and refrigerators ensures that bacteria and residue do not accumulate. Personal Hygiene: Personal cleanliness is equally vital. Washing hands with soap and water before handling food reduces the transfer of germs. Wearing clean clothing, tying back hair, and using gloves when necessary are additional measures that contribute to food safety. Proper Food Storage: Cleanliness also extends to the storage of food. Ensuring refrigerators and freezers are cleaned and maintained prevents spoilage and bacterial growth. Storing food in sealed containers and keeping raw items separate from cooked foods minimizes the risk of contamination. Waste Management: Effective waste disposal is another key factor in maintaining food safety. Accumulated waste can attract pests and create an unhygienic environment. Emptying trash bins regularly and cleaning them prevents the spread of bacteria. Enhancing Mental Health A clean and organized home environment has a profound impact on mental health, contributing to reduced stress, improved focus, and an overall sense of well-being. Maintaining cleanliness is more than just a practical necessity; it plays a critical role in fostering emotional stability and mental clarity. Reducing Stress and Anxiety: Clutter and dirt in the home can create a sense of chaos, leading to feelings of overwhelm and anxiety. Studies show that individuals living in messy environments often have higher levels of cortisol, the stress hormone. Conversely, a clean and tidy home promotes relaxation and provides a calming atmosphere, offering mental relief from external pressures. Boosting Productivity and Focus: A cluttered space can make it difficult to concentrate on tasks, whether it’s working from home or managing daily responsibilities. A clean and organized environment reduces distractions, allowing for better focus and increased productivity. The act of cleaning itself can also provide a sense of accomplishment and control, enhancing mental clarity. Improving Mood: Engaging in cleaning activities releases endorphins, the body’s natural “feel-good” chemicals. Additionally, living in a clean home can install pride and satisfaction, positively impacting self-esteem and overall happiness. Creating a Healthy Routine: Regular cleaning fosters a sense of structure and routine, which is essential for mental well-being. Establishing habits like tidying up before bed or dedicating time each week to deep cleaning can create stability, particularly for individuals dealing with mental health challenges. Promoting Better Rest: A clean bedroom, free from clutter and dust, contributes to improved sleep quality. Restful sleep is crucial for maintaining mental health and emotional resilience. Summary Cleanliness acts as a preventive measure, protecting individuals from short and long-term health complications. It is also the cornerstone of food safety. By adopting strict hygiene practices and maintaining clean environments, individuals can ensure the health and well-being of those consuming the food. Household cleaning is also a simple yet effective way to support mental health, creating a positive and peaceful environment that nurtures emotional well-being. Feel free to Contact Us if you require a Deep or Standard Clean of your home.

Read More »

How to Deep Clean an Oven: A Complete Guide

How to Deep Clean an Oven: A Complete Guide A sparkling clean oven not only looks great but also ensures better-tasting meals and prolongs the appliance’s lifespan. This comprehensive guide will help you deep clean your oven efficiently, including recommendations for top cleaning products and handy tips. Essential Tools and Materials Before you start, gather everything you’ll need to make the process smooth and hassle-free: Rubber gloves: Protect your hands from harsh chemicals and grease. Scrubbing pads or sponges: For scrubbing away stubborn grime. Microfiber cloths: Perfect for wiping and polishing surfaces. Plastic scraper: To remove burnt-on residue without scratching. Baking soda: A natural, non-toxic cleaner. White vinegar: Excellent for breaking down grease. Oven cleaner spray: For heavy-duty grime removal (recommended products listed below). Brush or toothbrush: For cleaning tight crevices. Trash bags: For disposing of food debris and paper towels. Bucket or bowl: To mix homemade cleaning solutions. Preparing the Oven for Cleaning Preparation is crucial to ensure safety and effectiveness. Follow these steps: Turn off the oven: Ensure it’s completely cool and unplug it if possible. Remove oven racks and trays: Take out all detachable parts and set them aside. Lay down protective layers: Place newspapers or old towels around the oven to catch drips or spills. Ventilate the kitchen: Open windows or turn on a fan if you’re using chemical cleaners. Cleaning the Oven Racks Oven racks often accumulate baked-on grease and grime. Clean them separately for the best results: Soak in warm soapy water: Fill a bathtub or large sink with hot water and add dish soap or baking soda. Submerge the racks for at least 30 minutes. Scrub thoroughly: Use a scrubbing pad or toothbrush to remove softened grime. Rinse and dry: Rinse with clean water and let them dry completely before reinserting. Applying a Cleaning Solution Assuming you do not have access to professional cleaning solutions, like the ones we use at Scrubs Cleaning, there are many good over-the-counter detergents that can be used for professional looking results. Best Commercial Oven Cleaners: Oven Pride: Recommended by Scrubs Cleaning. Weiman Oven & Grill Cleaner: Gentle but effective on tough stains. HG Oven, Grill and BBQ Cleaner: A more expensive but very effective option. Mr. Muscle Oven Cleaner: Ideal for burnt-on food residue. Homemade Option: If you prefer a more natural, eco-friendly solution, mix half a cup of baking soda with a few tablespoons of water to create a paste. It’s non-toxic, effective, and safe for most surfaces. Apply generously: Spread your chosen cleaner or baking soda paste over the interior surfaces, avoiding heating elements. Let it sit: Allow it to sit for at least 20-30 minutes or overnight for stubborn stains. Scrubbing and Wiping Once the cleaner has done its job, it’s time to scrub away the grime: Use a scraper: Gently remove softened residue with a plastic scraper. Scrub corners and crevices: Use a brush or toothbrush to tackle hard-to-reach spots. Wipe with a damp cloth: Remove loosened grime and cleaner residue using a damp microfiber cloth. Repeat if necessary: For particularly tough stains, reapply the cleaning solution and repeat the process. Cleaning the Oven Door The oven door often gets greasy and cloudy from cooking. Here’s how to clean it effectively: Remove the glass panel (if possible): Check your oven’s manual to see if the glass panel can be detached for easier cleaning. Apply cleaner: Use baking soda paste or a glass-safe oven cleaner. Scrub and polish: Use a sponge or cloth to remove grime, then wipe with a damp cloth to avoid streaks. Polish with vinegar: Spray vinegar on the glass and buff with a microfiber cloth for a streak-free shine. Final Rinse and Dry Once the oven is clean, make sure to rinse and dry all surfaces thoroughly: Wipe with clean water: Use a damp cloth to remove any remaining cleaner residue. Dry completely: Use a microfiber cloth to dry all surfaces to prevent streaks or watermarks. Reinsert racks and trays: Once dry, place the clean racks and trays back into the oven. Handy Tips for Oven Maintenance To keep your oven clean for longer, follow these tips: Use oven liners: Place a non-stick liner at the bottom of the oven to catch spills. Wipe spills immediately: Clean up any spills or drips as soon as the oven cools. Regular light cleaning: Wipe down the oven weekly to prevent grime buildup. Cover food: Use lids or aluminium foil when baking or roasting to minimize splatters. Run a self-cleaning cycle: If your oven has this feature, use it periodically to burn off residue. Summary Deep cleaning an oven doesn’t have to be daunting. By gathering the right tools, using effective cleaning products, and following a step-by-step process, you can restore your oven to its pristine condition. Whether you prefer commercial cleaners like Easy-Off or natural alternatives like baking soda and vinegar, the key is allowing the solution time to break down grease before scrubbing. With regular maintenance and these handy tips, you can keep your oven sparkling clean and functioning efficiently for years to come. Feel free to Contact Us if you require a Deep Clean of your house, including appliances.

Read More »

How to Deep Clean Your Fridge and Freezer: A Step-by-Step Guide

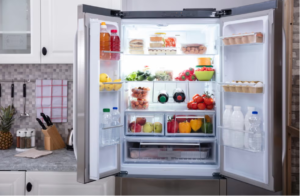
How to Deep Clean Your Fridge and Freezer: A Step-by-Step Guide Keeping your fridge and freezer clean is essential for maintaining food safety, prolonging the life of your appliances, and ensuring a fresh-smelling kitchen. This comprehensive guide will take you through the process of deep cleaning your fridge and freezer. Essential Tools and Materials Before you start, gather the tools and materials you’ll need for an efficient cleaning process. Having everything ready will save time and ensure the best results. Soft sponge or cloth: For scrubbing and wiping surfaces without causing scratches. Microfiber cloths: Ideal for drying and polishing surfaces. Mild dish soap: A gentle cleaning agent to remove grime and grease. White vinegar or baking soda: Natural cleaners for tough stains and odours. Bucket or basin: For mixing cleaning solutions and holding warm water. Toothbrush or small scrub brush: Perfect for cleaning tight spaces and crevices. Vacuum with a nozzle attachment: Useful for cleaning coils and hard-to-reach areas behind the fridge. Plastic spatula or scraper: For safely removing stubborn ice or food residues. Preparation and Safety Preparation is key to a successful deep cleaning. Take the following steps to prepare your fridge and freezer: Turn off the appliance: Unplug the fridge and freezer to conserve energy and ensure safety while cleaning. Remove all food items: Transfer perishable goods to a cooler with ice packs to keep them fresh during the cleaning process. Defrost the freezer: If there’s ice buildup, allow the freezer to defrost. Place towels around the base to catch melting water. Gather cleaning tools: Have your cleaning materials and tools within reach to streamline the process. Emptying and Sorting Contents As you empty the fridge and freezer, take the opportunity to organise and declutter. Check expiration dates: Discard any expired or spoiled items. Sort by category: Group similar items together, such as dairy, meats, and vegetables, for easier restocking later. Wipe containers: Clean sticky jars or containers before placing them back in the fridge. Removing Shelves, Drawers, and Racks To clean thoroughly, remove all detachable components from your fridge and freezer. Take out shelves, drawers, and racks: Carefully remove these parts and set them aside. Soak in warm soapy water: Place them in a basin or sink filled with warm water and mild dish soap. Let them soak to loosen grime. Scrub and rinse: Use a sponge or brush to clean each piece, then rinse thoroughly with clean water. Dry completely: Use a microfiber cloth to dry each item before reinserting them. Cleaning the Interior Now it’s time to clean the inside surfaces of your fridge and freezer. Wipe down surfaces: Use a sponge or cloth dipped in warm soapy water to clean the walls, ceiling, and floor of the fridge and freezer. Scrub stubborn stains: For tough spots, apply a paste of baking soda and water or use diluted vinegar. Let it sit for a few minutes before scrubbing. Clean crevices and seals: Use a toothbrush to clean around rubber seals and in tight corners. Rinse and dry: Wipe the interior with a damp cloth to remove soap residue, then dry with a microfiber cloth. Defrosting and Ice Removal If your freezer has built-up ice: Let the ice melt: Leave the freezer door open to allow the ice to defrost naturally. Place towels to absorb the melting water. Place hot water inside: If you want to speed the process, put bowls or glasses of hot water inside the freezer. Use a plastic scraper: Gently remove ice chunks that loosen during defrosting. Avoid sharp tools that can damage the appliance. Wipe away water: Use a cloth or sponge to remove any remaining moisture. Cleaning the Exterior Don’t forget about the outside of your fridge and freezer. A clean exterior contributes to the overall hygiene of your kitchen. Dust and vacuum coils: Use a vacuum with a nozzle attachment to clean the coils at the back or bottom of the appliance. This improves efficiency. Wipe the exterior: Use a damp cloth and mild soap to clean the doors and handles. Polish with stainless steel cleaner: If your fridge has a stainless steel finish, use a specialized cleaner to restore its shine. Clean the drip tray: Locate and empty the drip tray (if applicable), then wash and dry it thoroughly. Restocking and Organizing After cleaning, it’s time to put everything back in an organized manner. Insert shelves and drawers: Replace all detachable components once they’re dry. Restock efficiently: Place similar items together and ensure labels face forward for easy access. Use storage bins: Consider using bins or organizers to keep items tidy and prevent spills. Adjust temperature: Turn the appliance back on and set the correct temperature (below 40°F for the fridge, 0°F for the freezer). Tip: Preparing Your Fridge for a Holiday When going on holiday, it’s important to leave your fridge in a safe and hygienic state to avoid unpleasant surprises upon your return. Consume perishables: Use up or discard perishable foods to prevent spoilage. Adjust the temperature: If you’re leaving for a short trip, keep the fridge and freezer running at their normal settings. For longer trips, consider emptying and unplugging the appliance. Clean thoroughly: Wipe down all surfaces and remove any crumbs or spills to deter pests and odours. Leave the door ajar: If the fridge is unplugged, prop the door open slightly to allow airflow and prevent mould or mildew. Store essentials smartly: If the appliance remains on, stock only long-lasting items such as condiments and properly sealed frozen goods. Final Thoughts Deep cleaning your fridge and freezer might seem like a daunting task, but it’s essential for maintaining food safety, improving appliance efficiency, and keeping your kitchen fresh. By following the steps in this guide, you can ensure a thorough and effective clean. Regular maintenance, such as wiping spills immediately and checking expiration dates weekly, can reduce the frequency of deep cleans. With proper care, your fridge and freezer will remain hygienic and functional for years to come. Remember, a clean fridge

Read More »

A guide on how to Clean and Maintain Rattan and Wicker

A guide on how to Clean and Maintain Rattan and Wicker Rattan and wicker furniture and accessories are now on trend. They provide warmth, texture, and a natural charm to any space. However, due to their intricate design and delicate materials, they require proper care to maintain their beauty. In this guide, we’ll cover everything you need to know about cleaning and maintaining rattan and wicker furniture and accessories. Essential Tools and Materials Before you begin, gather the necessary tools and cleaning supplies to make the process efficient and safe for your furniture. Here’s a list of what you’ll need: Soft bristle brush: Ideal for removing dirt and dust from crevices without damaging the material. Microfiber cloths: These are gentle on the surface and help with wiping down delicate areas. Vacuum cleaner with a brush attachment: Useful for removing loose debris from tight spaces. Mild soap or detergent: Choose a gentle, non-abrasive soap to avoid damaging the finish. Bucket of warm water: For mixing the cleaning solution. Soft sponge: Perfect for applying the cleaning solution. Toothbrush: Helps reach tight spots where a larger brush can’t. White vinegar (optional): Acts as a natural disinfectant and cleaner. Furniture polish (optional): Helps maintain the shine of your rattan or wicker furniture. Dusting Your Rattan and Wicker Furniture Regular dusting is the first and most crucial step in maintaining your rattan and wicker pieces. Over time, dust can accumulate in the tiny crevices, making the furniture look dull and dirty. Steps for Dusting: Use a vacuum cleaner with a brush attachment to gently remove loose dirt and debris from the surface and crevices. For areas the vacuum can’t reach, use a soft bristle brush to sweep away the remaining dust. Wipe down the surface with a dry microfiber cloth to remove any lingering particles. Dusting regularly prevents dirt buildup and keeps your furniture looking fresh. Cleaning with a Mild Solution Once the dusting is done, it’s time to give your rattan or wicker furniture a deeper clean using a mild soap solution. Steps for Cleaning: Mix a few drops of mild soap or detergent with warm water in a bucket. Dip a soft sponge into the solution, wring it out thoroughly to avoid excess moisture, and gently wipe down the furniture. Use a toothbrush to clean hard-to-reach areas and intricate patterns. Once you’ve cleaned the entire piece, wipe it down with a damp microfiber cloth to remove any soap residue. Finally, use a dry cloth to absorb any remaining moisture. Avoid soaking the furniture, as excessive water can weaken the fibres and cause damage over time. Removing Stains Stains can occur due to spills, dirt, or prolonged exposure to the elements. Removing them quickly is key to preventing permanent discoloration. Steps for Removing Stains: If the stain is fresh, blot it gently with a dry cloth to absorb as much liquid as possible. For dried stains, prepare a mixture of equal parts white vinegar and warm water. Dip a soft cloth into the solution and gently dab the stained area. Use a toothbrush for stubborn stains, applying gentle circular motions. Wipe the area with a damp cloth to remove the vinegar solution, and dry it immediately. Test the vinegar solution on a small, hidden area first to ensure it doesn’t affect the colour or finish. Cleaning Outdoor Rattan and Wicker Furniture Outdoor furniture is exposed to weather elements, making it more prone to dirt, mildew, and fading. Steps for Cleaning Outdoor Furniture: Start by dusting and vacuuming the furniture to remove loose debris. Prepare a cleaning solution with mild soap and warm water. Use a soft bristle brush to scrub the furniture gently, focusing on areas with mildew or dirt. Rinse with a hose, ensuring that you don’t soak the furniture excessively. Dry the furniture thoroughly with a clean towel and let it air dry in the shade. Consider applying a UV-protective spray to prevent fading and weather damage. Dealing with Mildew Mildew can develop on rattan and wicker furniture, especially in humid environments. It’s important to address it promptly to avoid long-term damage. Steps for Removing Mildew: Mix one part white vinegar with three parts warm water. Dip a soft cloth or sponge into the solution and gently clean the affected areas. Use a toothbrush to scrub stubborn mildew spots. Wipe the furniture with a damp cloth to remove the vinegar residue. Dry the furniture thoroughly to prevent future mildew growth. For severe mildew issues, you may need to use a commercial mildew remover specifically designed for natural fibres. Polishing and Conditioning Polishing helps maintain the natural lustre of rattan and wicker, while conditioning prevents the material from becoming brittle. Steps for Polishing and Conditioning: Use a furniture polish specifically made for rattan or wicker. Apply a small amount of polish onto a clean cloth and rub it gently over the surface. Buff the furniture with a dry cloth to enhance the shine. Conditioning with a light coat of boiled linseed oil once or twice a year can help preserve the fibres and prevent cracking. Preventive Care Tips Prevention is better than cure when it comes to maintaining rattan and wicker furniture. Follow these tips to keep your furniture in top shape: Avoid direct sunlight: Prolonged exposure to sunlight can cause fading and drying of the fibres. Use cushions: Cushions reduce wear and tear on the seating areas. Keep indoors during extreme weather: If your furniture is outdoor, store it indoors during harsh weather conditions. Regular dusting: Prevents dirt buildup and reduces the frequency of deep cleaning. Rotate furniture: Rotating pieces periodically ensures even wear and exposure. Final Thoughts Rattan and wicker furniture bring a natural elegance to any space, but they require proper care to stay beautiful and functional for years. Regular dusting, gentle cleaning, and preventive maintenance go a long way in preserving these delicate materials. With the right tools, techniques, and a little bit of effort, your rattan and wicker pieces can remain timeless additions to your home. By

Read More »
Which clean are you interested in?