Scrubs Logo

CONTACT US: 020 8146 8571
London's #1 End of Tenancy Specialists
CONTACT US: 020 8146 8571
London's #1 End of Tenancy Specialists

Blog

Understanding the Price of End-of-Tenancy Cleaning in London

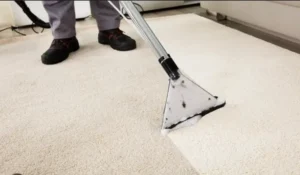
Understanding the Price of End of Tenancy Cleaning in London Moving out of a rented property in London comes with a host of responsibilities, and one of the most crucial is End of Tenancy cleaning. Whether you’re a tenant wanting your full deposit back, or a landlord preparing the property for new renters, professional cleaning is often a must. But how much does it cost in London? Do I have to pay for an End of Tenancy Clean? Technically, a tenant’s responsibility is to leave the property in the same condition it was found, less fair wear and tear. Hence, there is no formal requirement to pay for a professional cleaning service. That being said, there are times when leaving the property in the same condition requires the use of professional equipment and expertise that most tenants won’t have. For example, if the carpets were professionally cleaned via Hot Water Extraction before their arrival. Then, unless the tenant happens to have and know how to use a professional Hot Water Extraction machine, then they are going to have to pay for someone to do it. More crucially, are the vigorous cleanliness standards that are difficult to meet without the appropriate experience and equipment. At times, an End of Tenancy Clean is possible to DIY, but it will take significantly longer than customers expect. If the clean is not completed to the cleanliness standards and requirements, then your landlord will likely hire a premium, next-day cleaning service, which will be very expensive (2-3X more than the normal rates), that will be deducted from your deposit. Average Costs So, if you have decided that it is a good idea to hire a professional End of Tenancy cleaning provider, then how much should you pay? The price of end of tenancy cleaning in London can vary significantly based on the size of the property, its condition, the quality of cleaning provider and the specific services required. Here’s a rough breakdown of what you can expect to pay. Note, these are approximations without extras such as carpet cleaning, upholstery cleaning and curtain cleaning. Property Size Estimated Cost Range Studio Flat £125 – £205 1-Bedroom Flat £185 – £225 2-Bedroom Flat/House £225 – £285 3-Bedroom Flat/House £190 – £280 4-Bedroom House or Larger £325– £500+ Factors That Influence Price Size and Layout of the PropertyNaturally, a larger home will require more time and effort to clean. More bedrooms, bathrooms, and living areas mean a higher cost. Condition of the PropertyIf the property is particularly dirty or has not been regularly maintained, expect to pay more for the extra labour and materials needed. Extra ServicesSome services aren’t always included in the standard price. These can add to your total: Carpet cleaning: £40–£70 per room Upholstery cleaning: £25–£125 per item Wall spot cleaning: additional £20–£50 Balcony/patio cleaning: varies depending on size Furnished vs UnfurnishedFurnished properties usually require more time and resources to clean due to the extra furniture/belongings that are in the property. Location Within LondonCentral London properties often come with a higher price tag due to traffic (increased travel time), congestion charges, and general cost of living. What’s Typically Included A reputable cleaning company in London will offer a comprehensive checklist to meet inventory standards, including: Thorough cleaning of all rooms Oven and hob cleaning Inside cupboards and appliances Limescale removal in bathrooms Vacuuming and mopping all floors Cleaning light switches, plugs, and skirting boards Dusting and wiping surfaces Interior windows Make sure to ask for the full checklist in advance and confirm that it aligns with your landlord’s or letting agent’s expectations. Please see what is included in our End of Tenancy cleaning list. Value for Money Though it may seem like a big upfront cost, end of tenancy cleaning is an investment. A professional clean: Increases your chances of getting your full deposit returned Ensures the property meets letting standards Saves you time, effort, and stress during your move In many cases, the cost of a professional clean is less than the potential deductions a landlord might make for insufficient cleaning. How to Get the Best Price Compare quotes from several reputable cleaning companies. Check reviews to ensure quality and reliability. Ask about guarantees – some companies will offer a re-clean, free of charge if the landlord or agent isn’t satisfied. Scrubs Cleaning offers a 7-day guarantee to all our clients. WARNING: Not all Cleaning Companies are created equal Unfortunately, due to the unregulated nature of the residential cleaning industry, there are many cowboys and phonies that you need to watch out for. They will charge End of Tenancy Cleaning prices but NOT clean to the required cleanliness standards. Then, when the check-out inspection fails, they will find a reason not to return and go over the missed areas. Hence, your landlord will deduct the cost of premium, next-day End of Tenancy Cleaning service ASWELL! To avoid this, check reviews! Give them a read to make sure they look legitimate. Then, we would recommend at least 100+ reviews with nothing less than a 4.8/5 average score. In terms of the review platforms, the best for service-businesses are Google and Trustpilot. Final Thoughts End of tenancy cleaning in London is a service that varies in cost, but it’s also one where you often get what you pay for. Cutting corners could risk losing a portion, or all, of your rental deposit. By choosing an experienced, transparent, and fairly-priced cleaning provider, you can move out with peace of mind. Feel free to contact Scrubs Cleaning if you need any advice or support regarding an upcoming End of Tenancy clean.

Read More »

How to Clean an AGA Cooker: A Step-by-Step Guide

How to Clean an AGA Cooker: A Step-by-Step Guide An AGA cooker is a beloved centrepiece in many kitchens, known for its classic design, solid build, and exceptional cooking capabilities. However, due to its constant heat output and multi-functional nature, cleaning and maintaining an AGA cooker requires a different approach than standard ovens. Keeping it clean not only preserves its aesthetic appeal but also ensures efficient operation and prolongs its life. This guide will walk you through the process of cleaning your AGA safely and effectively. Understanding Your AGA Before diving into cleaning techniques, it’s essential to understand the basic components of an AGA: Hotplates: Typically covered by insulated lids, these are used for boiling and simmering. Ovens: Usually comprise a roasting, baking, simmering, and warming oven. Enamel Exterior: The iconic shiny exterior that can attract smudges, fingerprints, and spills. Flue (if applicable): Vents heat and emissions outside. Each part of the AGA requires different care and attention, so it’s crucial to follow appropriate cleaning methods. Daily Maintenance Wipe Spills Immediately Use a soft, damp cloth or a microfiber cloth to wipe up any spills as they happen, especially on the enamel surface. Avoid letting food or grease bake onto hot surfaces. Close the Lids When not in use, keep the hotplate lids down to prevent dust or food particles from accumulating. Quick Brush of Crumbs Crumbs can fall into door seals and around oven openings. Use a soft brush or handheld vacuum to gently remove debris. Clean the Enamel Surface Use a damp, non-abrasive cloth with a gentle cleaner specifically formulated for vitreous enamel. Avoid harsh chemicals, scouring pads, or wire wool, which can damage the surface. Recommended Products: AGA-approved enamel cleaner A mixture of mild dish soap and water Polish with a Dry Cloth After cleaning, buff the enamel surface with a dry, soft cloth to restore its natural shine. Cleaning Hotplates The hotplates are used frequently and can accumulate burnt-on food or carbon deposits. Allow to Cool While some residue is easier to clean when warm, the surface should not be too hot to touch safely. Use a Wire Brush or Hotplate Scraper AGA provides hotplate cleaning tools like a wire brush and scraper designed not to damage the cast iron. Gently brush or scrape the surface to remove buildup. Avoid Water Never pour water on a hotplate. If you need to wipe it down, use a barely damp cloth when the plate is cool. Cleaning the Ovens AGA ovens are always on (except in newer models), which helps burn off a lot of residues. Still, routine cleaning is necessary. Please make sure the AGA is cool before you try to clean the ovens. Roasting and Baking Ovens Remove loose debris using a brush or vacuum. Use a damp cloth to wipe down the inside walls. For tougher grime, use an AGA-approved oven cleaning paste. Do not use spray-on commercial oven cleaners—they can damage the cast iron and give off harmful fumes. Simmering and Warming Ovens These generally stay cleaner, but a quick wipe with a soft cloth every week will help maintain them. Cleaning Oven Racks and Trays Remove and Soak Take out the racks and trays and soak them in hot soapy water. A non-abrasive sponge should be used to scrub them clean. Use Baking Soda Paste For stubborn spots, make a paste of baking soda and water, apply it, and let sit for 15–20 minutes before scrubbing gently. Doors and Seals Inspect and Clean Door Seals Check the door seals regularly for crumbs or debris. Wipe them gently with a damp cloth and avoid using sharp tools near them. Clean the Inner Glass (if applicable) Some AGA models have glass panels. Clean them using a vinegar-water solution or a special glass cleaner. Never spray directly; apply to the cloth first. Cleaning the Flue Check the Flue Regularly If your AGA is flue-connected, check for blockages or soot buildup. Have it professionally inspected and cleaned once or twice a year. Deep Cleaning and Professional Servicing Schedule Professional Maintenance At least once a year, book a professional AGA service to check components, clean inaccessible parts, and ensure safety features are in working order. Avoid DIY Disassembly Do not attempt to take apart key components. AGAs have complex systems that should be handled by certified technicians. Do’s and Don’ts of AGA Cleaning Do’s and Don’ts of AGA Cleaning Do: Use AGA-recommended cleaning products. Wipe surfaces regularly to prevent buildup. Allow surfaces to cool before cleaning.   Don’t: Use abrasive tools or steel wool. Use commercial oven cleaners unless specifically AGA-approved. Pour water onto hot surfaces. Eco-Friendly Tips Use natural cleaners like vinegar, baking soda, and lemon where safe. Reuse cloths and brushes instead of disposable wipes. Avoid harsh aerosols that can damage enamel and pollute indoor air. Conclusion An AGA cooker is both a functional appliance and a design statement. With regular cleaning and the right techniques, you can keep it looking stunning and running efficiently for decades. Whether you’re managing daily spills or performing deep seasonal cleaning, taking care of your AGA ensures that it remains the heart of your kitchen—warm, welcoming, and wonderfully clean. If you need an End of Tenancy, Deep of After Build Cleaning Service, please contact Scrubs Cleaning.

Read More »

How to Keep Your Carpet Clean: A Comprehensive Guide

How to Keep Your Carpet Clean: A Comprehensive Guide Carpets add warmth, comfort, and aesthetic appeal to any home. However, they also attract dust, dirt, allergens, and stains. Maintaining a clean carpet is not just about appearance—it also promotes better air quality and extends the life of your flooring investment. In this comprehensive guide, we will explore how to keep your carpets clean with both daily practices and long-term care strategies. Daily and Weekly Maintenance Vacuum Regularly One of the simplest and most effective ways to maintain a clean carpet is to vacuum frequently. High-traffic areas should be vacuumed daily or every other day, while less-used areas can be vacuumed once or twice a week. Use a vacuum cleaner with strong suction and a HEPA filter (High-Efficiency Particulate Air) to remove fine dust and allergens. Address Spills Immediately The quicker you clean a spill, the less likely it is to leave a permanent stain. Blot (don’t rub) the spill with a clean, dry cloth or paper towel to absorb as much liquid as possible. Then apply a suitable carpet cleaner or a mixture of water and mild detergent to clean the area. Use Doormats and Remove Shoes Prevent dirt and debris from entering your home by placing doormats at all entrances. Encourage family members and guests to remove their shoes upon entering to minimise the dirt that reaches your carpet. Use Area Rugs in High-Traffic Areas Place rugs or runners in areas that receive a lot of foot traffic, such as hallways and living room entrances. These rugs take the brunt of wear and tear and are easier to clean or replace than wall-to-wall carpeting. Deep Cleaning / Steam Cleaning Even with regular vacuuming, carpets accumulate embedded dirt and oils. Deep cleaning should be done every 6 to 12 months. You can either hire a professional carpet cleaning service or rent a carpet cleaning machine. Steam cleaning uses hot water extraction to remove deep-seated dirt, allergens, and bacteria. It is one of the most effective carpet cleaning methods and should be considered at least once a year. Spot and Stain Removal Tips Pet Stains For accidents involving pets, it’s crucial to clean the area promptly to avoid odours and bacteria. Use an enzyme-based cleaner specifically designed for pet stains. Red Wine and Coffee Blot the spill immediately, then apply a solution of water and white vinegar or a carpet stain remover. For red wine, club soda can also be effective. Grease or Oil Apply a small amount of dishwashing liquid mixed with warm water to break down greasy stains. Blot gently with a cloth until the stain lifts. Ink Stains Rubbing alcohol can help dissolve ink stains. Dab a small amount onto a clean cloth and gently blot the stain. Mud and Dirt Allow mud to dry completely before attempting to clean. Once dry, vacuum up as much as possible, then blot the area with a mixture of warm water and mild detergent. Blood Stains Use cold water and blot the stain with a clean cloth. Avoid warm or hot water, which can set the stain. If necessary, use a solution of water and salt or hydrogen peroxide. Chewing Gum and Wax Harden the gum or wax with an ice cube, then gently scrape it off using a spoon or dull knife. Use a small amount of rubbing alcohol or carpet cleaner to remove any residue. Juice and Soda Blot the spill, then use a mixture of one part vinegar and one part water to clean the area. Finish by blotting with a clean, dry cloth. Long-Term Preventative Measures Invest in Carpet Protectors Consider using carpet protectors under furniture to prevent crushing and stains. Fabric protectors like Scotchgard can also create a barrier against spills and make cleaning easier. Groom Your Pets Regularly Regular brushing reduces the amount of fur and dander that ends up in your carpet. Keep pet nails trimmed to avoid snagging carpet fibres. Air Filtration and Humidity Control Using air purifiers and maintaining indoor humidity between 40-60% helps control dust mites and allergens that settle in carpets. Replace Worn Carpets Even with excellent care, carpets eventually wear out. If your carpet is threadbare, stained beyond cleaning, or has lingering odours, it may be time to replace it. Choosing the Right Products and Tools Vacuum Cleaners: Look for vacuums with adjustable height settings and HEPA filters. Carpet Shampooers: Ideal for deep cleaning; available for purchase or rental. Brushes and Scrubbers: Use soft-bristled brushes to avoid damaging carpet fibers. Stain Removers: Choose non-toxic, carpet-safe formulas. Always test in an inconspicuous area. If you prefer natural alternatives, several household items can be used for eco-friendly carpet cleaning: Vinegar: Great for general cleaning and odour removal. Baking Soda: Effective deodoriser. Lemon Juice: Natural bleaching agent for light carpets. Castile Soap: Gentle and effective when diluted. Conclusion Keeping your carpet clean requires a combination of daily habits and occasional deep cleaning. By understanding how to care for your carpets properly, you not only improve the appearance of your home but also create a healthier living environment. Whether you choose to do it yourself or using professional services, the key is consistency. With the right tools and strategies, your carpets can look fresh and feel comfortable for many years to come. If you need a professional Carpet, End of Tenancy, Deep of After Build Cleaning Service, please contact Scrubs Cleaning.

Read More »

Understanding the Labelling of Cleaning Products: What You Need to Know

Understanding the Labelling of Cleaning Products: What You Need to Know In today’s world, consumers are increasingly conscious of the products they use in their homes, particularly when it comes to cleaning supplies. Understanding the labels on cleaning products is essential not only for making informed purchasing decisions but also for ensuring the safety and effectiveness of their use. In the UK, cleaning product labelling is governed by a combination of UK REACH (Registration, Evaluation, Authorisation and Restriction of Chemicals), the Classification, Labelling and Packaging (CLP) Regulation, and additional UK-specific standards. This article will help demystify common terms and symbols found on cleaning product labels so you can shop—and clean—with confidence. Why Reading Labels Matters Cleaning products contain a range of chemicals that can pose health risks or environmental concerns if used improperly. The label is your guide to: Safe usage instructions Proper storage and disposal Understanding active ingredients Allergen or toxicity warnings Environmental impact Misinterpreting a label can lead to ineffective cleaning, damaged surfaces, or even harm to people and pets. That’s why it’s essential to understand what you’re reading. Key Sections of a Cleaning Product Label Product Name and Purpose This tells you what the product is designed for—disinfecting, degreasing, glass cleaning, toilet bowl cleaning, etc. Always choose a product suitable for the task. Active Ingredients These are the chemical compounds that perform the main cleaning function. Some common active ingredients include: Sodium hypochlorite – a common bleach and disinfectant. Quaternary ammonium compounds (quats) – found in many disinfectants. Hydrogen peroxide – used for its bleaching and disinfecting properties. Citric acid – a natural acid used to break down mineral deposits. Lactic acid – often used in natural cleaning products for its antimicrobial properties. Ethanol (ethyl alcohol) – an effective antiseptic and disinfectant. Isopropyl alcohol – used for sanitising and quick drying. Ammonia – a powerful cleaner often used in glass and surface cleaning products. Sodium lauryl sulfate (SLS) – a surfactant that helps remove grease and dirt. Sodium carbonate (washing soda) – a water softener and degreaser. Enzymes – such as protease or amylase, used in stain removal and laundry detergents. Benzalkonium chloride – another disinfectant commonly found in antibacterial cleaners. These ingredients may vary in concentration depending on the intended use of the product and the required level of cleaning or disinfection. Directions for Use This section outlines how to properly use the product to achieve the best results and avoid damage or injury. This may include dilution instructions, contact time (especially for disinfectants), and whether rinsing is needed. Hazard Statements and Precautionary Statements Under the UK CLP Regulation, cleaning product labels must include hazard statements that describe the nature of the hazard (e.g., “Causes serious eye irritation”) and precautionary statements outlining safety measures (e.g., “Wear protective gloves/eye protection”). Look out for: “Danger” – Indicates a high level of risk. “Warning” – Signifies a moderate risk. Symbols like an exclamation mark (!) or skull and crossbones are regulated icons to indicate hazard levels. First Aid Measures This tells you what to do in case of accidental exposure, such as inhalation, skin contact, or ingestion. This section is critical in an emergency. Storage and Disposal Instructions Improper storage can lead to chemical degradation or safety risks. Disposal instructions help you avoid harming the environment or violating local council regulations. Certifications and Seals Products may carry UK-specific or international certifications such as: EU Ecolabel (still recognised in the UK for products already certified) Leaping Bunny – Certified cruelty-free Vegan Society Approved – No animal-derived ingredients Common Terms on Cleaning Product Labels Biodegradable Refers to a product or its ingredients breaking down naturally into non-harmful components. This term is not strictly regulated in the UK, so third-party certification is helpful. Non-Toxic Implies the product doesn’t pose significant risk to human health when used as directed. Again, this is a loosely defined term and should be viewed with some skepticism unless backed by certification. Antibacterial Contains agents that kill or inhibit the growth of bacteria. This does not necessarily mean the product is effective against viruses or fungi. Claims must be supported by scientific evidence under UK advertising regulations. Disinfectant In the UK, disinfectants must meet efficacy standards set by the Health and Safety Executive (HSE). Products often carry an HSE number to show compliance. Sanitiser Sanitisers reduce, but may not eliminate, microorganisms to safe levels. They are commonly used in food preparation areas and must meet HSE guidelines. Fragrance-Free vs. Unscented Fragrance-Free: No fragrance chemicals are added. Unscented: May contain masking agents to neutralise odour but still include chemicals. pH-Balanced Indicates the product has a neutral pH, which is less likely to damage skin or sensitive surfaces. Concentrated Means the product is more potent and should be diluted before use. This is often more economical and environmentally friendly. Interpreting Hazard Symbols Cleaning products in the UK must use hazard pictograms in line with the CLP Regulation. Examples include: Skull and crossbones – Acute toxicity. Corrosion – Skin burns and eye damage. Exclamation mark – Skin/eye irritation or respiratory tract issues. Flame – Flammable chemicals. These symbols help you quickly assess the risks and handle the product accordingly. Green Cleaning: What to Look For As consumers seek eco-friendlier options, understanding green labels becomes crucial. Look for: Plant-based ingredients No phosphates or chlorine Recyclable or refillable packaging Transparent ingredient disclosure UK-recognised certifications include: EU Ecolabel Leaping Bunny Soil Association (for some household products) Tips for Safer Use of Cleaning Products Always read the entire label before using any product. Keep products out of reach of children and pets. Never mix cleaning products (e.g., bleach and ammonia). Use gloves and proper ventilation when needed. Follow dilution instructions carefully. Conclusion Understanding the labelling on cleaning products in the UK empowers you to make safer, smarter choices for your home and family. Labels are more than just marketing—they’re a guide to safe, effective, and responsible cleaning. Take the time to read and interpret them correctly, and you’ll be well-equipped to maintain a clean

Read More »

Cleaning Products That Could Damage Your Home

Cleaning Products That Could Damage Your Home Maintaining a clean home is a priority for many, but the cleaning products you use can sometimes cause more harm than good. While most cleaning agents are designed to make our homes safer and more hygienic, improper use or choosing the wrong product can lead to significant damage to surfaces, furniture, appliances, and even your health. This article will explore several cleaning products that, if misused, can cause harm to your home, along with safer alternatives and best practices. 1. Bleach (e.g., Clorox, Lysol Bleach) Bleach is a powerful disinfectant and stain remover, but it is also highly corrosive. When used on certain surfaces like stainless steel, natural stone (like granite or marble), or colored fabrics, it can cause irreversible damage, including discoloration, etching, and pitting. Mixing bleach with other cleaning agents, such as ammonia or vinegar, can also create toxic fumes, which are harmful to health. Safe Alternatives: Use hydrogen peroxide as a disinfectant or opt for a gentle all-purpose cleaner for routine cleaning. 2. Ammonia-Based Cleaners (e.g., Windex Original Glass Cleaner) Ammonia is a common ingredient in many glass cleaners, but its harsh nature can damage surfaces like wood, leather, and certain electronic screens. Repeated use on surfaces like hardwood flooring can strip away finishes, leaving them dull and susceptible to further damage. Safe Alternatives: Use a mixture of vinegar and water for a streak-free shine on glass. For wood, choose pH-balanced, wood-specific cleaners. 3. Vinegar (e.g., Heinz Cleaning Vinegar) Vinegar is a popular natural cleaner, but it is also acidic, which means it can damage natural stone surfaces (like granite, marble, and limestone) by etching and dulling their finish. It can also harm grout over time, making it more susceptible to staining and moisture. Safe Alternatives: For natural stone, use a pH-neutral cleaner. For grout, consider a mild soap solution or a specialized grout cleaner. 4. Abrasive Cleaners (e.g., Comet Powder Cleanser, Ajax) Abrasive powders or scrubbing pads are effective at removing tough stains, but they can leave scratches on delicate surfaces such as glass cooktops, stainless steel, porcelain sinks, and ceramic tiles. Over time, these scratches can become stained and worsen the appearance of the surface. Safe Alternatives: Use soft microfiber cloths or non-abrasive sponges with gentle, non-scratch cleaning solutions. 5. Acid-Based Cleaners (e.g., Lysol Toilet Bowl Cleaner, Lime-A-Way) Cleaners containing hydrochloric acid, sulfuric acid, or phosphoric acid are often used for tough stains or toilet cleaning. However, these can corrode metal fixtures, damage natural stone, and even harm plastic surfaces. Prolonged use can also degrade grout and caulk in bathrooms. Safe Alternatives: Opt for gentler toilet cleaners without harsh acids, or use baking soda and a mild detergent for most cleaning tasks. 6. Hydrogen Peroxide (e.g., Swan Hydrogen Peroxide Solution) While hydrogen peroxide is a great disinfectant, using it on dark or coloured surfaces can lead to discoloration. It can also damage certain types of countertops, especially natural stone, if left on too long. Safe Alternatives: Use hydrogen peroxide only on light-coloured surfaces and test in an inconspicuous area before use. 7. Dish Soap on Stone Surfaces (e.g., Dawn Dish Soap) Dish soap might seem like a mild cleaner, but when used on stone surfaces over time, it can leave a residue that dulls the finish. This is particularly problematic for granite or marble countertops, which can lose their polished look. Safe Alternatives: Use a specialized stone cleaner or a diluted pH-neutral soap for stone surfaces. 8. Multi-Purpose Cleaners (e.g., Pine-Sol, Mr. Clean Multi-Surface Cleaner) Not all multi-purpose cleaners are suitable for all surfaces. Some may contain chemicals that can strip protective coatings on furniture, damage delicate fabrics, or harm painted surfaces. Safe Alternatives: Always read the label carefully and use surface-specific cleaners when in doubt. Best Practices for Safe Cleaning Always read the manufacturer’s instructions for both the surface you are cleaning and the cleaning product you are using. It is essential to understand the labels, terminology, and ingredients included in the products. Conduct a patch test in an inconspicuous area before using a new cleaning product. Store cleaning products safely, away from children and pets. Use appropriate personal protective equipment (like gloves and masks) when handling strong chemicals. Opt for eco-friendly, pH-neutral, and non-toxic cleaning products whenever possible. Conclusion While it is essential to keep your home clean, it is just as important to ensure that the products you use are used on the right surfaces and do not cause unintended damage. By being aware of the potential risks of certain cleaning products and adopting safer alternatives, you can maintain a clean, beautiful, and damage-free home. Understanding the impact of these products not only preserves the value of your home but also protects your health and well-being. At Scrubs Cleaning, we are extremely careful with our cleaning products. If you need a professional End of Tenancy, Deep of After Build Cleaning Service, please contact Scrubs Cleaning.

Read More »

How To Clean A Vacuum and Vacuuming Tricks & Hacks

How To Clean A Vacuum and Vacuuming Tricks & Hacks Keeping your vacuum cleaner in top condition not only extends its lifespan but also ensures optimal performance. A clean vacuum means better suction, less wear and tear, and improved indoor air quality. Additionally, mastering a few vacuuming tricks and hacks can help make cleaning faster, more efficient, and even more effective. Here’s a comprehensive guide on how to clean your vacuum and some clever vacuuming techniques to elevate your cleaning routine. How To Clean A Vacuum Cleaner Unplug and Disassemble Safety first—always unplug your vacuum before cleaning. Remove all detachable parts, such as the dustbin, filters, hoses, and attachments. Check the manual for instructions on how to disassemble it properly, as different models may have specific components. Empty and Wash the Dustbin A full dustbin reduces suction power. Empty it after each use or when it reaches the maximum fill line. Wash the bin with warm, soapy water to eliminate dust residue and odours. Allow it to dry completely before reinserting to avoid mold or mildew buildup. Clean or Replace Filters Filters trap allergens and dust, so keeping them clean is essential for air quality and vacuum efficiency. Many vacuums have washable filters—rinse them with lukewarm water (without soap) and let them air-dry for at least 24 hours. For non-washable filters, replace them as recommended (usually every 3–6 months). Check the Hose and Nozzles Blockages in the hose or nozzle can drastically affect performance. Detach the hose and look through it for any clogs. Use a broomstick, wire hanger, or bottle brush to remove debris. Clean the nozzles with a cloth and inspect for tangled hair or dust buildup. Clear the Brush Roll The brush roll (or beater bar) often traps hair, string, and carpet fibres. Remove it from the vacuum head if possible. Use scissors or a seam ripper to cut away entangled debris. Check the bearings and ends of the roll to ensure it spins freely. Clean the Belt The belt drives the brush roll. If it’s loose, cracked, or broken, it should be replaced. A slipping or worn-out belt reduces cleaning efficiency and can damage the vacuum motor. Wipe Down the Exterior Use a damp microfiber cloth to clean the vacuum’s exterior. Focus on handles, buttons, and areas where dust can collect. For stubborn grime, use a small amount of mild detergent. Inspect Wheels and Base Wheels can gather hair and debris that hinders movement. Remove anything wrapped around them and wipe the base to keep your vacuum gliding smoothly. Reassemble and Test Once everything is clean and dry, reassemble the vacuum. Turn it on to test for any strange noises or performance issues. If it runs smoothly, you’re good to go! Recommended Vacuum Brands and Why to Choose Them Dyson Dyson vacuums are known for their advanced cyclonic technology and powerful suction. Their cordless stick models like the V15 Detect offer strong performance, hygienic bin emptying, and laser dust detection. Dyson vacuums are ideal for allergy sufferers and tech-savvy users who want high efficiency and innovation. Shark Shark offers a range of versatile and affordable vacuums. Models like the Shark Navigator and Shark Vertex combine powerful suction with anti-allergen complete seal technology. Shark vacuums are user-friendly, easy to clean, and come with various attachments for different surfaces. Miele Miele vacuums are known for their durability and superior filtration systems. Their canister vacuums like the Miele Complete C3 are particularly effective for hard floors and low-pile carpets. Miele’s HEPA filters and sealed systems make them ideal for homes with pets and allergy concerns. Bissell Bissell is a great budget-friendly brand with reliable upright and handheld models. Their vacuums, like the Bissell CleanView and Pet Hair Eraser, are specially designed for pet owners. Bissell also supports pet adoption with part of their proceeds. Hoover Hoover vacuums like the WindTunnel series offer strong performance for both carpets and hard floors. They are known for being lightweight, easy to manoeuvre, and equipped with multi-floor cleaning technology. Hoover also provides great value for the price. Roomba (iRobot) For automated vacuuming, Roomba robotic vacuums are industry leaders. Models like the Roomba j7+ can map your home, avoid obstacles, and self-empty their bins. They’re perfect for busy households or for daily touch-ups. The downside of the iRobot is the price. Choosing the right vacuum brand depends on your cleaning needs—consider factors like home size, flooring type, allergies, and whether you have pets. Investing in a reputable brand ensures better longevity, warranty support, and cleaning results. Vacuuming Tricks & Hacks A good vacuuming strategy can reduce cleaning time and improve results. These hacks will help you clean smarter, not harder. Use Baking Soda for Odours Before vacuuming carpets, sprinkle a light layer of baking soda to absorb odours. Let it sit for 10–15 minutes, then vacuum it up. This leaves your home smelling fresh and neutralizes lingering pet or food smells. Vacuum in Both Directions Vacuuming in just one direction misses embedded dirt. Vacuuming both forward and backward (and even side to side) lifts more dirt, especially in high-traffic areas. Use the Right Attachment for Each Task Attachments matter. Use the crevice tool for tight corners and edges, the dusting brush for blinds and shelves, and the upholstery tool for couches and mattresses. Rotating these tools makes your vacuum more versatile. Clean in a Grid Pattern For large rooms, divide the space into smaller sections and clean each in a grid-like pattern. This ensures you cover the entire area methodically without skipping spots. Use a Cardboard Tube to Extend Reach Flatten a cardboard paper towel roll and attach it to your vacuum’s hose to clean small or awkward spaces like vents, drawers, and under appliances. Tackle Pet Hair with a Rubber Broom First Before vacuuming, use a rubber broom or squeegee to gather pet hair on carpets or furniture. This makes vacuuming more effective and prevents clogs. Freshen Carpets and Rugs For a quick refresh, mix equal parts baking soda and dried lavender

Read More »

How to Organise Your Bathroom to Make It Look Tidy and Practical

How to Organise Your Bathroom to Make It Look Tidy and Practical The bathroom is one of the most used spaces in any home, yet it can easily become cluttered and chaotic without proper organization. A tidy, well-organized bathroom not only enhances the appearance of the space but also increases functionality, saves time, and reduces stress. Whether you have a spacious master bath or a compact powder room, the following guide offers practical tips and strategies to help you keep your bathroom organized, tidy, and highly functional. 1. Declutter First Before implementing any organizing systems, the first step is to declutter. Go through every drawer, cabinet, shelf, and corner of your bathroom and remove items that are expired, unused, or unnecessary. Pay special attention to: Expired medications and cosmetics Nearly empty or duplicate product containers Unused hair tools or accessories Old towels or linens Once you’ve pared down your belongings to only what you truly need or love, you’ll find it easier to organise everything effectively. Deep clean the bathroom before you start organising it. 2. Categorise Your Items Sort your remaining items into categories. Common bathroom item categories include: Daily essentials (toothbrush, toothpaste, face wash) Hair care (shampoo, conditioner, brushes, hair dryer) Skin care (lotions, serums, razors) First aid (bandages, ointments, pain relievers) Towels and linens Others Categorization helps you see what you have, avoid buying duplicates, and designate specific storage areas for each type of item. 3. Maximize Cabinet and Drawer Space Use dividers and organizers to make the most of cabinet and drawer space. Try these ideas: Drawer trays or containers for separating small items like cotton swabs, hair ties, and nail clippers Stackable bins or tiered shelves in cabinets to use vertical space Clear containers so you can see contents easily Labels for quick identification Organizing your storage spaces makes it easy to find what you need quickly and put things back in the right spot. 4. Optimise Under-the-Sink Storage The area under the sink often becomes a dumping ground for random items. Instead, use this valuable space wisely: Add a small set of drawers or stackable bins Use a tension rod to hang spray bottles Install a pull-out organizer to improve access Use baskets or bins to group similar items together Make sure plumbing access is not obstructed when setting up your under-sink system. 5. Make Use of Vertical Space Bathrooms often lack sufficient surface area, so take advantage of your walls and vertical storage: Install shelves above the toilet or near the vanity Use hanging organizers or wall-mounted baskets Add hooks for towels, robes, or hair tools Consider a tall, narrow shelving unit for small spaces Vertical storage solutions keep surfaces clutter-free while providing easy access to everyday items. 6. Use Clear and Stackable Containers Clear containers are ideal for bathroom organization because they let you see what’s inside without opening them. Stackable containers maximize limited space and allow for vertical arrangement inside cabinets or on shelves. Labelling containers adds another layer of convenience, especially in shared bathrooms. 7. Implement a Towel Storage System Towels can quickly clutter a bathroom if not properly stored. Consider the following storage solutions: Towel bars for everyday use Hooks for quick drying and easy access A towel rack or ladder for display and storage Baskets or cubbies for rolled or folded clean towels Store clean towels in an easy-to-reach place and have a designated area for used towels to keep things tidy. 8. Streamline Your Countertops Bathroom countertops often collect clutter. Limit the number of items on display to keep the area looking clean and organized: Use a tray to corral frequently used items Store rarely used products in drawers or cabinets Keep only daily essentials on the counter A tidy counter enhances visual appeal and makes cleaning surfaces easier. 9. Add Personal Touches Without Cluttering A bathroom can be both functional and inviting with the right decor. Add personality with minimal clutter by including: A small plant or flower arrangement A piece of art or framed photo Coordinated soap dispensers and containers A scented candle or diffuser These touches add style without sacrificing practicality. 10. Rotate and Refresh Regularly To maintain an organized bathroom, make it a habit to rotate and refresh items regularly: Toss expired products every few months Replace worn-out linens Rearrange storage to accommodate new items A seasonal refresh ensures your space remains tidy and functional over time. 11. Make It Easy for Everyone to Stay Organized If your bathroom is shared, create a system that everyone can follow: Label shelves, drawers, and bins Assign each person a designated storage area Use color-coded containers or accessories Encouraging everyone to stick to the system will help maintain order and reduce daily messes. Conclusion Organizing your bathroom isn’t just about aesthetics; it’s about creating a space that works for you and supports your daily routine. By decluttering, categorizing, and utilizing smart storage solutions, you can transform your bathroom into a tidy, practical, and stress-free space. Whether you’re doing a quick tidy-up or a complete overhaul, these tips will help you achieve a more functional and visually pleasing bathroom environment. If you need a professional End of Tenancy Cleaning Service, including your bathrooms, please contact Scrubs Cleaning.

Read More »

The Pros and Cons of End of Tenancy Cleaning Options

The Pros and Cons of End of Tenancy Cleaning Options End of tenancy cleaning is a crucial part of moving out of a rented property. Whether you’re a tenant aiming to get your deposit back, a landlord preparing a property for new tenants, or a property manager ensuring consistency across rentals, the cleanliness of the premises plays a significant role. Tenants are generally expected to leave the property in the same condition as it was when they moved in. This necessity gives rise to a major decision: should you hire professional cleaners or tackle the task yourself? Below is a detailed look at the pros and cons of the different end of tenancy cleaning options to help you make the best choice for your situation. Hiring a Professional End of Tenancy Cleaning Service Pros: Thorough and Efficient CleaningProfessional cleaning companies specialize in deep cleaning. They come equipped with industrial-grade equipment, experienced staff, and effective cleaning agents that are not typically available to the average person. This means they can clean more thoroughly and efficiently than most individuals. Saves Time and EnergyMoving out is stressful and time-consuming. Hiring professionals allows you to focus on packing, paperwork, and the transition, rather than scrubbing floors and descaling taps. It’s especially beneficial if you’re on a tight schedule. Increases the Likelihood of Getting Your Deposit BackA spotless property significantly improves your chances of receiving your full deposit. Many landlords and letting agents expect a professional standard of cleanliness and may deduct money for any areas not cleaned to their expectations. Receipt and Guarantee ProvidedMany professional services offer a cleaning receipt and guarantee. If the landlord or agency finds any issues, the cleaning company often returns free of charge to address them. This is a valuable safety net. Compliance with Letting Agent ChecklistsProfessional cleaners are familiar with the standard checklists used by letting agencies and landlords. They know what needs to be cleaned and how, ensuring nothing is missed. Cons: CostProfessional cleaning can be expensive. Prices vary based on the size of the property, its condition, and the location, but it typically ranges from £100 to £400 or more. For some tenants, this cost may be a significant burden. Scheduling IssuesYou’ll need to schedule the cleaning service around your moving timeline and their availability. During peak times (e.g., end of the month), bookings may be limited or more expensive. Risk of Unsatisfactory WorkNot all cleaning companies deliver on their promises. Poor quality service or a lack of attention to detail could lead to complaints from landlords, and some less reputable companies may be difficult to get back for re-cleans. Limited ControlYou won’t have control over the cleaning methods or products used unless you specify them beforehand, which can be a concern for those with allergies, pets, or eco-conscious preferences. DIY End of Tenancy Cleaning Pros: Cost-EffectiveDoing the cleaning yourself is the cheapest option. You’ll only pay for cleaning supplies, saving a substantial amount compared to hiring professionals. In 2024, 30% of consumers purchased more private-label household products compared to the previous year. Control Over Products and MethodsYou can choose eco-friendly or allergy-safe products and take your time to ensure everything meets your standards. This control may be reassuring, especially for families with specific health needs. FlexibilityYou can clean at your own pace and on your own schedule. This flexibility is particularly useful if your moving dates change or if you prefer to clean as you pack. Opportunity to Spot RepairsWhile cleaning, you may notice maintenance issues—scuffed paint, loose fixtures, or damaged tiles—that you can address before your landlord does. This proactive approach can help safeguard your deposit. Cons: Time-Consuming and Physically DemandingEnd of tenancy cleaning is more intensive than regular cleaning. It involves tasks like cleaning behind appliances, washing windows, removing limescale, and cleaning ovens—often under time pressure. May Lack the Professional TouchDespite your best efforts, DIY cleaning may fall short of professional standards. Some areas may be overlooked, or the results may not be as polished, which could lead to deductions from your deposit. No Guarantee or Re-clean OptionIf your landlord isn’t satisfied, you’ll have to redo the work yourself or hire a cleaner at the last minute. This can be stressful, particularly if you’re already juggling other responsibilities. Equipment LimitationsYou might not have access to specialized equipment (e.g., steam cleaners, carpet washers), making it harder to achieve deep cleanliness, especially for carpets and upholstery. Hybrid Approach: Partial DIY and Professional Help Pros: Balanced Cost and QualityHiring professionals for the hardest tasks—like carpet or oven cleaning—while handling the rest yourself can save money and still ensure a high-quality result. Customizable ServiceYou can tailor the cleaning to your needs. If you’re confident cleaning general surfaces but not comfortable cleaning windows or bathrooms, a hybrid approach offers flexibility. Less Physical StrainOutsourcing the most demanding tasks helps reduce fatigue and makes the process more manageable, especially for elderly tenants or those with physical limitations. Cons: Coordination RequiredYou’ll need to manage your own cleaning while also coordinating with the professionals. Miscommunication or scheduling conflicts can complicate the process. Deposit Still at RiskIf your own cleaning falls short of the landlord’s expectations, you could still face deductions. Ensure you understand which tasks are covered by the professionals and which are your responsibility. Can Still Be CostlyWhile cheaper than full professional services, hiring cleaners for certain tasks still involves a financial outlay. Which Option Is Best? The right choice depends on your budget, available time, cleaning skills, and the expectations of your landlord or letting agent. If your lease specifies professional cleaning or if the inventory check is strict, hiring a service might be worth the investment. If you’re confident in your cleaning abilities and want to save money, a DIY approach could be suitable. For many, the hybrid method offers a good balance of cost and convenience. Final Thoughts End of tenancy cleaning can make a significant difference in how smoothly your move goes and whether you retrieve your full deposit. Weigh the pros and cons of each

Read More »

Forgotten Places and Tools in the House That People Often Neglect to Clean

Forgotten Places and Tools in the House That People Often Neglect to Clean When it comes to cleaning the house, most people focus on visible surfaces like floors, countertops, and bathrooms. However, there are many areas and household tools that often get overlooked, leading to hidden dirt, dust, and bacteria buildup. Here’s a comprehensive guide on the places and tools in your home that need extra attention during your next deep cleaning session. Forgotten Places in the House That Need Cleaning Light Switches and Door Handles Light switches and door handles are touched multiple times a day, making them breeding grounds for germs and bacteria. A simple wipe-down with disinfectant wipes or a cloth with soapy water can keep these areas clean and germ-free. Baseboards and Moulding Dust and grime accumulate along baseboards and moldings, but they often go unnoticed. Use a damp cloth or a vacuum with a brush attachment to remove dirt and keep your home looking fresh. Ceiling Fans and Light Fixtures Ceiling fans collect dust on their blades, which can spread throughout the room when turned on. Similarly, light fixtures accumulate dust and dead insects. Wipe down fan blades with a microfiber cloth and clean light fixtures regularly. Under and Behind Furniture Areas beneath couches, beds, and heavy furniture tend to gather dust, pet hair, and debris. Move furniture periodically to vacuum or sweep these neglected spaces. Air Vents and Ducts Dust and allergens build up inside air vents and ducts, reducing air quality. Use a vacuum with a brush attachment to clean vent covers and consider professional duct cleaning for a deeper clean. Window Tracks and Blinds While windows may get cleaned regularly, their tracks and blinds are often neglected. Use a small brush or a vacuum crevice tool to remove dust from tracks, and wipe down blinds with a damp cloth. Behind and Under Appliances The spaces behind and under refrigerators, stoves, and washing machines collect dust, crumbs, and grease. Move these appliances occasionally to sweep, mop, or vacuum these hard-to-reach spots. Shower Curtains and Liners Mildew and soap scum build up on shower curtains and liners over time. Toss fabric curtains into the washing machine with mild detergent and replace plastic liners when they become too grimy. Inside Kitchen Drawers and Cabinets Crumbs, dust, and spills accumulate inside kitchen drawers and cabinets. Empty them out periodically and wipe down the interior with a damp cloth. Under Sink Areas The area under sinks can develop mold, mildew, and leaks. Wipe down surfaces, check for plumbing issues, and organize cleaning supplies to keep these spaces tidy. Bathroom Exhaust Fans Bathroom exhaust fans help remove moisture but also gather dust over time. Use a vacuum or a brush to clean the vent cover and ensure proper airflow. Dishwasher and Washing Machine Seals Dishwasher and washing machine seals trap moisture and food particles, leading to mold growth. Wipe down rubber seals with a vinegar solution or mild detergent. Pillows and Mattress Covers While pillowcases and sheets are washed regularly, pillows and mattress covers need cleaning too. Machine wash pillows every few months and vacuum mattresses to remove dust mites. Remote Controls and Electronics TV remotes, gaming controllers, and keyboards collect dirt and germs from frequent use. Wipe them down with disinfectant wipes or a microfiber cloth. Closet Floors and Shelves Closet floors and high shelves accumulate dust and forgotten items. Vacuum the floors and dust the shelves to maintain a cleaner space. Behind the Toilet While toilet bowls and seats are cleaned regularly, the area behind the toilet often gets ignored. Wipe it down with disinfectant to prevent dust and grime buildup. Pet Bowls and Toys Pet food and water bowls collect bacteria and should be washed daily. Similarly, pet toys accumulate dirt and saliva and should be cleaned regularly with soap and water. Trash Cans and Recycling Bins Even with liners, trash cans develop unpleasant odors and residue. Wash them with soap and water and disinfect them occasionally to prevent bacteria growth. The Tops of Cabinets and Fridges High surfaces like the tops of kitchen cabinets and refrigerators collect dust and grease. Wipe them down every few months to prevent buildup. Inside the Oven and Microwave Spills and splatters inside ovens and microwaves harden over time. Use baking soda and vinegar or a store-bought cleaner to remove stuck-on grime. Forgotten Household Tools That Need Cleaning Brooms and Mops Brooms collect dirt and dust while mops retain moisture, making them a breeding ground for bacteria. Rinse brooms outdoors and soak mop heads in a disinfectant solution regularly. Vacuum Cleaners and Filters Vacuum filters, hoses, and brushes accumulate dust and debris. Clean or replace filters and empty canisters frequently for better performance. Sponges and Dish Brushes Kitchen sponges and brushes gather bacteria and should be replaced every two weeks. Disinfect them by soaking in a vinegar solution or microwaving damp sponges for one minute. Toothbrush Holders Toothbrush holders collect toothpaste residue and moisture, making them prone to mould growth. Wash them with hot soapy water regularly. Coffee Makers and Kettles Coffee makers and kettles accumulate mineral deposits and bacteria. Run a vinegar and water solution through them monthly to remove buildup. Reusable Shopping Bags Fabric shopping bags collect dirt and germs from groceries. Wash them in the washing machine or wipe down plastic ones with disinfectant wipes. Hairbrushes and Combs Hairbrushes and combs trap hair, oil, and product buildup. Remove hair regularly and soak brushes in warm soapy water to keep them clean. Cutting Boards Wooden and plastic cutting boards can gather bacteria from food residue. Scrub them with a mixture of baking soda, vinegar, and salt for a deep clean. Blenders and Food Processors Blender gaskets and food processor blades accumulate food residue. Disassemble and wash thoroughly after each use. Faucet Aerators Faucet aerators trap mineral deposits and can affect water flow. Remove and soak them in vinegar to remove buildup. Doormats Doormats collect dirt from shoes and need to be shaken out and vacuumed regularly.

Read More »

How to Clean Brass: A Comprehensive Guide

How to Clean Brass: A Comprehensive Guide Brass is a widely used metal in home decor, musical instruments, kitchenware, and hardware. Its rich golden hue makes it an attractive material, but it can tarnish over time due to oxidation. Regular cleaning and maintenance ensure that brass items remain shiny and well-preserved. This guide explores the best methods to clean and care for brass using both natural and commercial solutions. Identifying Brass Type Before cleaning brass, it’s essential to determine whether it is solid brass or brass-plated: Solid Brass: Does not attract a magnet and can tolerate more rigorous cleaning. Brass-Plated: A magnet will stick to it, meaning it has a thin layer of brass over another metal. Harsh scrubbing or strong chemicals can damage the plating. Basic Cleaning with Soap and Water For everyday maintenance, soap and water are effective: Mix warm water with a few drops of mild dish soap. Dip a soft cloth or sponge into the soapy water and wipe the brass surface. Rinse with clean water and dry immediately with a microfiber cloth to prevent water spots. Removing Tarnish with Natural Cleaners Tarnish develops on brass due to oxidation, but natural cleaners can help restore its luster: Lemon and Salt Cut a lemon in half and sprinkle table salt on the cut side. Rub the lemon directly onto the brass surface. Let the juice sit for a few minutes before rinsing with warm water. Dry and buff with a clean cloth for a polished finish. Vinegar and Baking Soda Mix equal parts white vinegar and baking soda to form a paste. Apply the paste to the brass and let it sit for 5-10 minutes. Use a soft cloth or toothbrush to scrub gently. Rinse thoroughly and dry immediately. Ketchup or Tomato Paste Apply a thin layer of ketchup to the tarnished brass. Let it sit for 10-15 minutes, allowing the acid to break down oxidation. Wipe off with a damp cloth, rinse with water, and dry thoroughly. Worcestershire Sauce Apply Worcestershire sauce to a soft cloth and rub onto the brass. Let it sit for a few minutes before wiping off with a damp cloth. Rinse with water and dry completely. Cleaning Heavily Tarnished Brass For deeper cleaning, stronger methods may be necessary: Ammonia Bath Fill a container with household ammonia. Submerge the brass item for a few minutes (do not leave for too long to avoid damage). Remove, rinse with water, and dry thoroughly.   Commercial Brass Cleaners Use a high-quality brass cleaner like Brasso or Wright’s Brass Polish. Apply the cleaner according to the product’s instructions. Buff the surface with a clean, dry cloth to restore shine. Polishing and Protecting Brass After cleaning, polishing brass helps maintain its luster: Apply a thin layer of beeswax, mineral oil, or lacquer to prevent oxidation. Store brass items in a dry, cool environment to minimize exposure to moisture. Regularly dust and wipe brass fixtures to prevent dirt buildup. Additional Tips for Long-Term Maintenance To keep brass looking its best over time, consider the following tips: Avoid harsh abrasives: Steel wool and rough scrubbing pads can scratch brass surfaces. Use a soft brush for intricate details: A toothbrush or soft-bristled brush works well for ornate brass pieces. Apply a clear lacquer finish: If you want to extend the time between cleanings, consider applying a lacquer coating to brass items to slow down oxidation. Store brass items properly: If you have brass heirlooms or collectibles, keep them in a cloth-lined case or wrap them in a soft fabric to prevent dust accumulation and exposure to humidity. Regularly inspect brass fixtures: For frequently used brass items like doorknobs and handles, wipe them down weekly to prevent grime buildup. Conclusion Cleaning brass effectively requires the right techniques to remove tarnish while protecting the metal. Whether using natural ingredients like lemon and vinegar or commercial polishes, regular maintenance ensures brass items remain beautiful and well-preserved. By incorporating these cleaning methods and long-term care tips, you can keep your brass items in excellent condition for years to come, preserving their beauty and functionality. Please contact Scrubs Cleaning if you need a deep clean of your whole house, including brass.

Read More »
Which clean are you interested in?